Writing Utensils

02.29.2016

0830

DSC_3897

When it comes to simplifying your life to create a zero waste life, there are a lot of tasks to tackle in every aspect of your life. It takes time and you have to go through your bathroom, kitchen, closet, pantry, car; every area of everything you own. So there will come a point during this clean out process that you come across items that can’t be donated or recycled, which means you’re producing trash. The struggle here is to either use up the item and then eventually throw it away or toss it out immediately. This is the case with my writing utensils.

In my undergrad, because I was an art & design student, I was required to buy a lot of art supplies. When I say a lot, I mean Prismacolor Premier Double Ended Art Markers, Brush Tip and Fine Tip, Set of 24 Assorted Colors, Prismacolor Premier Soft Core Colored Pencil, Prismacolor Nupastel Set, Winsor & Newton Cotman Water Color 12-Tube Set, Royal & Langnickel Small Tin Charcoal Drawing Art Set, Koh-i-noor Woodless 12 Graphite Set, and the list goes on and on. However, the great thing about art supplies is that someone else always needs it. Once I graduated, I donated  some of my art supplies to my former BFA program and I also donated items to incoming art & design students, whom I was connected through colleagues of mine.

I have a basic rule I live by when it comes to keeping art supplies, “If it’s a ‘wet’ art supply, donate it”. I stick to that rule because the majority of the items that I “think I will use,” I most likely won’t use it again before it dries out. I understand that some people need creative outlets to express themselves, but for me- I only keep items that require minimal maintenance.

I kept my Pentel Sharp Mechanical Pencil, 0.7mm, Blue Barrel, Each (P207C), Avery AVE49838 Tripleclick Ballpoint Multifunction Retractable Pen, Black Ink, M, Black , Pilot Dr. Grip Ballpoint Ink Refills , PRISMACOLOR DESIGN Eraser, 1224 Kneaded Rubber Eraser , Pentel Super Hi-Polymer Lead Refills, 0.5 mm lead refills and Pentel Super Hi-Polymer Lead Refill , 0.7 mm lead refills. I am more creative and can speed sketch faster when I work with graphite and ink. I work in the architecture and design industry and there is a level of creativity that I must maintain. I’ve opted out of junk mail as much as I can but a few pieces still get through so I use scraps of paper from junk mail to take notes on.

As time passes, I will see if I want to stick with my Pilot Dr. Grip ink refills. The packaging that these refills come in are not completely environmentally friendly so I still question the use of them. However, I will probably stick with lead. Lead is one of my favorite rendering mediums and there’s something very comfortable with using a pencil that takes me back to my childhood. I recommend using the kneadable eraser because the eraser doesn’t slough off when you use it so there’s no mess left over from using it.

DSC_3901

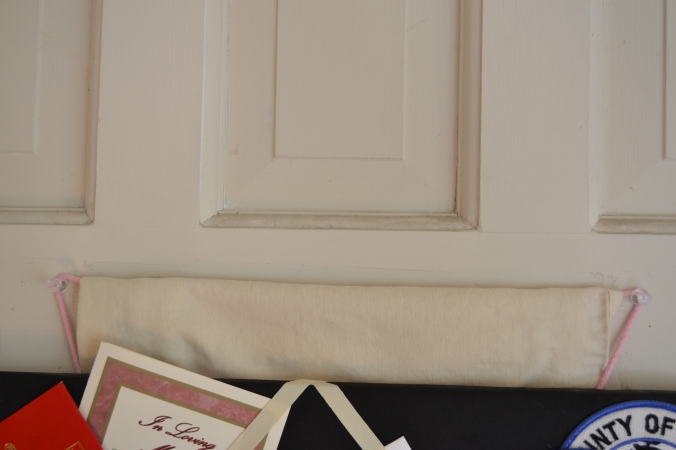
On a side note, if you do have a set of colored pencils like this:

DSC_3904

It’s not a bad idea to write out each code number of each colored pencil on a piece of paper so that you know exactly how the color is going to render on plain white paper. With this system, when you go to the art store to replace a single pencil, you’ve already got the info.

DSC_3902

DIY Foot Rest Solution

02.24.2016

0800

DSC_3550

Back View

DSC_3551

Side View

DSC_3553

Close Up Detail View

Materials:

  • One 2″ x 4″ lumber piece, long enough to reach across the width of the table
  • Sandpaper
  • Shoelace

Tools:

  • Mitre saw
  • Drill and drill bits

When I sit at my desk, I tend to prefer to rest my feet on something. Part of the reason for this is because of the height of my seat (I sit on my hope chest). If I don’t rest my feet on something, then my hips are higher than my knees and it’s uncomfortable for me. I used to use my art supplies box as a foot rest, but it became an extra piece of furniture that I had to constantly move when I swept.

I needed a solution that would solve this issue but not sit directly on the floor. I went to a lumber yard to look for a scrap 2×4 piece of wood, long enough to fit the width of my desk. I took the 2×4 piece of wood, trimmed it to the appropriate length, drilled two holes on each end and strapped it onto the frame of my desk with extra rope I had saved. This way, the surface area isn’t too wide, which means it wouldn’t gather too much dust, and it is still off of the floor.

I had tested it out with double sided carpet tape, but the glue was not as reliable. In any situation when pressure or movement is applied to the object, the likelihood, is that the object will not stay in place over time.  I could have used another piece of 2×4 in order to make the foot rest surface wider, but I didn’t want the foot rest wide enough so that it would gather more dust on its own. The option of pushing my foot rest up against the front legs was also an option, but I needed the 2×4 to be directly under the location of where my knees would rest whist in a seated position, in order for the my body to be comfortable.

For those of you who may have this issue, I hope this solution helps. So happy drilling and keep a lookout for 2×4 pieces of wood at scrap yard locations, or at your local lumber mill.

Know Your Knots

02.22.2016

0845

Materials:

  • Rope

Tools:

  • Pole to test out knots on

As someone who loves to keep extra rope and twine around, it makes sense that I made it a point to learn how to tie knots. But in addition to that, is that I actually carry a 100 foot parachord (Parachute cord) in my snowboarding backpack when I go up to the mountains. If you understand how to tie certain knots in certain situations, that knowledge can help you survive a situation, or help you while working over heights or water. Just knowing how to tie a few knots can still help you in many situations. Here are some knots that might be helpful:

  1. Reef Knot- This knot is a binding knot for connecting two lines together or a line around an object. It’s simple and effective and it is also known as a square knot.
    1. 01- Square Knot
  2. Clove Hitch- This knot can secure a line to a tree or post quickly, but it needs an anchor or it will slip.
    1. 02- Clove Hitch
  3. Bowline- This knot can create a nonadjustable loop at the end of the line, so the shape stays fixed.
    1. 03- Bowline
  4. Figure 8- This knot creates a stopping knot at the end of a line. This prevents the rope from unraveling and can also keep the rope from slipping past another rope.
    1. 04- Figure 8
  5. Sheet Bend- This technique can tie two different types of rope material together. This knot allows the joining of different thicknesses of rope as well.
    1. 05- Sheet Bend
  6. Two Half Hitches- This knot allows a line to be secured to trees or poles
    1. 06- Two Half Hitches
  7. Taut Line Hitch- This is an adjustable loop knot that will grip as long as there is tension on the “taut” side of the loop. Tension is maintained by sliding the hitch to adjust size of the loop. It can be used to secure tent lines or securing loads on vehicles.
    1. 07- Taut Line Hitch
  8. Improved Clinch Knot- This knot is used to secure a fishing line to a fishing lure or an artificial fly.
    1. 08- Fisherman's Knot
  9. Water Knot- This knot secures webbing, belts and straps together
    1. 09- Water Knot
  10. Rolling Hitch- A rolling hitch is used to attach a rope to a rod, pole or another rope.  It is used for lengthwise pull along an object rather than at right angles. The rolling hitch is designed to resist lengthwise movement for only a single direction of pull.
    1. 10- Rolling Hitch
  11. Prusik Knot- This knot is a friction hitch and it is used to put a loop of cord around a rope. It is used in climbing, mountaineering and rope rescue.
    1. 11- Prusik Knot
  12. Timber Hitch- This hitch will secure a rope around a cylindrical object. It is secure as long as tension is maintained but can be easily untied even after hauling a heavy load of weight.
    1. 12- Timber Hitch
  13. Blood Knot- This knot is used in fishing to secure two lines together. It will join sections of nylon line, while maintaining a high portion of the line’s inherent strength.
    1. 13- Blood Knot
  14. Artillery Loop- This knot creates a loop on the bight (the slack part between two ends of a rope). As long as the artillery loop is loaded, it will not slip and contract.
    1. 14- Man Harness
  15.  Carrick Bend- This knot is used to join two lines together. It can be used for heavy rope or cable that is too stiff to bend into other hitches.
    1. 15- Carrick Bend

If you keep in mind a few of these knots, they may very well help you in dire situations. It is a simple skill to know these knots by heart, but it can be one of the most useful as well. I always use ropes for a number of projects and situations and I have learned that the physics that go into tying a knot is so self sustainable, that I don’t have to worry about much else.

Natural Air Filtering Plants

02.17.2016

0800

DSC_3557DSC_3560

Plants are great for indoor decor as well as connecting humans with a little bit of nature. Even better is when you can choose a plant that will benefit you and your family.

I have a Golden Pothos (Scindapsus aures) plant indoor and I’ve had it since May 2013. Golden Pothos are great for filtering formaldehyde and it stays green even when kept in the dark. It’s great for rooms near garages. It needs indirect, bright light and only needs watering once a week or once every week and a half. Originally, when I bought the plant, it looked like this:

2013-05-12 23.11.29

When the plant started cascading over the edge of the hanging flower pot, I found an old metal chain and used it to hang up the plant. I used an S-Hook to adjust the height of the chain over time. S-Hooks are great for making almost any ledge more versatile. As this plant continues to grow, I’ll readjust the height of the chain, but so far it seems happy where it is.

DSC_3627

DSC_3630

Some other plants that can be used as natural indoor air filters are:

  1. Aloe (aloe Vera) aloe-vera-plant-1
    1. Great for kitchens &bathrooms
    2. Battles formaldehyde and benzene, which can be a byproduct of chemical-based cleaners, paints and more.
  2. Spider plant (Chlorophytum comosum)Chlorophytum-comosum-zebra-spider-plant-620x412
    1. Great for all residential rooms
    2. Battles benezene, formaldehyde, carbon momoxide and xylene, a solvent used in the leather, rubber and printing industries. This plant is very easy to grow and maintain being that it prefers cool to average temperatures and dry soil. It needs bright indirect light to keep growing.
  3. Gerbera Daisy (Gerbera jamesonii)Gerbera jamesonii
    1. Great for laundry room & bedroom
    2. Can remove trichloroethylene and benzene from pollutants that come home with dry cleaning and inks . This plant needs lots of light and well drained soil.
  4. Snake Plant (Sansevieria trifasciata ‘Laurentii’) Snake Plant (Sansevieria trifasciata 'Laurentii'
    1. Great for the bathroom, kitchen & bedroom
    2. Filters formaldehyde, which is common in cleaning products and carbon monoxide, which is common in toilet paper, tissues and personal care products. It also releases oxygen at night. These thrive in low light and steamy humid conditions.
  5. Chrysanthemum (Chrysantheium morifolium) chrysanthemum_morifolium
    1. Great for bedrooms, office, kitchen and laundry room
    2. This plant not only brightens up a room with it’s unique colors, but it filters benzene, which is commonly found in glue, paint, plastics and detergent. It needs bright light in order for the buds to open, but not direct sunlight.
  6. Red-edged Dracaena (Dracaena marginata) RedEdgedDrac
    1. Great for living rooms, dining rooms &kitchens
    2. This plant removes xylene, trichloroethylene and formaldehyde, which can seep into indoor air through lacquers, varnishes and gasoline. It grows slowly, but can reach up to 15 feet in height, so it’s suggested that this plant be placed in a area with a high ceiling, but with moderate sunlight.
  7. Weeping Fig (Ficus benjamina)   download
    1. Great for living rooms
    2. Can filter out formaldehyde, benzene and trichloroethylene, which come from pollutants that typically accompany carpeting and furniture. This plant is a little tricky to take care of with but with the right amount of light, water and temperature, it can grow into a beautiful sculpture.
  8. Azalea (Rhododendron simsii) Rhododendron-simsii-2
    1. Great for living rooms, dining rooms, basements
    2. This shrub can battle formaldehyde from sources such as plywood or foam insulation. These plants strive in temperatures that range between 60-65 °F.
  9. Warneck Dracaena (Dracaena deremensis ‘Warneckii’) dracaena-warneckiei-plant
    1. Great for living rooms, dining rooms and kitchens.
    2. This plant can combat pollutants associated with varnishes and oils. Keep in mind that this plant has the potential to reach 12 feet high and grows easily in an indoor environment, even without direct sunlight.
  10. Chinese Evergreen (Aglaonema Crispum ‘Deborah’) Chinese-evergreen-Aglaonema-crispum-Deborah
    1. Great for all residential rooms
    2. Filters a number of pollutants and will remove more toxins over time with more exposure. This plant has been nicknamed “the easiest houseplant” because it will thrive in low light and can survive in places other plants cannot. These plants like humid air so misting the leaves occasionally will keep them happy.
  11. Bamboo Palm (Chamaedorea Sefritzii) bamboo-palm-tree-chamaedorea-seifrizii-20-01-b-realpalmtrees.com
    1. Great for living rooms, dinging rooms and kitchens
    2. This plant filters out both benzene and trichloroethylene. It should be placed around furniture that could be off-gassing formaldehyde. It prefers humidity and bright indirect sunlight.
  12. Heart Leaf Philodendron (Philodendron oxycardium) Heart Leaf Philodendron (Philodendron oxycardium
    1. Great for all residential rooms
    2. Can remove all kinds of VOCs (Volatile organic compounds) and formaldehyde from sources like particleboard. However, it is toxic when eaten so keep out of reach of children and pets. This plant is very low maintenance and needs indirect light with room for its vines to grow.

Consider using an indoor plant that filters air naturally. Make sure you check the maximum height at which the plant will inevitably grow to and if they need to be re-potted into a larger pot . It’s better to not be surprised a few months into this investment. These plants can help clean indoor air on Earth, which is typically far more polluted than outdoor air and the benefits also include creating a more sustainable indoor environment.

Needed A Phone Holder For The Car

02.15.2016

0800

Materials:

  • Shoelace
  • Carabiner
  • Metal rings
  • Box that would fit my cell phone
  • Electrical tape (try to match the same color as the new cell phone holder)

So I made this phone holder in 2011, it was right around the time when the statistic of distracted driving started becoming an issue. Quite frankly, I don’t text and drive, I enjoy driving when I’m driving. The idea of getting pulled over for a ticket is also not one of my goals. However, I still used my GPS map when I drove to new locations. I did research different types of phone holders for cars and I wasn’t happy with any of the designs.

I like to keep surfaces clean, mostly because I hate to move things when I wipe down a surface, and then move them back. The mounting units that came with the phone holders would either have a set holder that would attach to surfaces or they were movable. There was the option of using the devices that had a suction cup to stay attached to my windshield, but if my windshield temperature got too cold, it would slowly release the suction and the entire device would fall down.

I love the Law of Gravity. I really do. I utilize it in almost everything I design or make. This was my solution to my problem.

DSC_3514DSC_3515DSC_3516

I used the black case that my 1 TB external hard drive, and used rings to hang the case from my vent system in my car. I cut a rectangular hole on the bottom so that I could attach the charging cord. I cut out a rectangular hole so that I could see the screen when I drove and I used electrical tape to clean the edges. (I use electrical tape when the environment calls for some sort of heat fluctuation.) The holder is slightly bigger than the phone, but I figured, iPhones are getting larger with each generation so why not.

I have an old car but I still love looking at this contraption. It’s just amusing to see my solutions. It’s not the prettiest iPhone holder, nor do I think it would sell, but I didn’t go out any buy anything and it still works to this day.

Always Consider Gravity

02.10.2016

0830

When I create a solution for any situation in my life, I always, always consider gravity first. Being that I also live in the Bay Area, items tend to fall when earthquakes occur. My solution to this issue is hanging everything. I keep extra shoelaces, metal rings, and carabiners around for this very reason.

I also like to keep my floor clear because when I run around with my microfiber dust mop, I don’t like to move things. In other words, items wont be on the floor to get in my way. This rule applies for any surface area in my home as well. I’m simply not a big fan of dusting. I will dust, but it has to be a once over type of effort, for me to move items, then dust, and then place items back feels like a waste of time and effort. Multiply that task for each week of the year, and the wasted time will add up.

dsc_3555DSC_3588DSC_3594

I hang many items around, but these are a few of the examples. I hang my mirror on my door along with a pencil bag that holds my dry erase pens to write on the mirror with. I actually draw a calendar on my mirror for the fact that I know I wont miss it when I check myself in the mirror. (It also helps because I don’t like to buy paper calendars.) I use a laptop and I hate the sound of my transformer box dragging across my hard wood floor, so I made a denim pocket out of an old pair of jeans to hang it up. I also cut a hole on the other side of the pocket for the other cord to poke out of. My drafting table ruler is also hanging next to it since I now use my drafting table as my desk and it was getting in the way. I have a 3-tier basket which I place items that would normally find their way onto the surface of the kitchenette counter, and I even have other items hanging from that was well.

DSC_3595dsc_3598

dsc_3556

Using shoelaces, I hang my memory board up to cover the window on my door. There was a small gap when I hung it up, so I used a fabric napkin to simply cover the opening. I’ve always hung up my kitchen timer as well. I used a magnet clip and simply took a hook screw and attached it to the top, and not screwing it too far in as to hit the bell on the inside. My bookshelf is also right next to my desk (this desk has no drawers) so I hang up my pencil holder as well.

These are just a few items that I hang up. Hanging up items is an easier way to maintain my space and I know that if an earthquake was to ever occur, these items wont fall. On top of that- dusting is a breeze.

Tết 2016- The Set Up and Food

02.08.2016

0800

So I just wanted to share the set up that my family uses for Tết. We use the alter, entryway dresser and dining table as our platforms. The alter is for Buddha (bàn thờ Phật), the entryway dresser is used for the Saint of the Property (Đức Đai) and the dining table is used for my ancestors (ông, bà).

Before the Tết ceremony begins: (Day 1)

DSC_3756DSC_3757DSC_3768

During the Tết ceremony: (Day 1)

DSC_3775DSC_3787DSC_3774DSC_3791DSC_3781DSC_3764

On the alter sits a bowl of dry rice in which we have placed many incense sticks (cây nhang) over the years during each Tết celebration. On the entryway table is the set up for the Saint of the Property (Đức Đai), which includes a small bowl of dry rice for the incense sticks, water glasses, a variety of foods such as soup (Canh), Vietnamese braised pork with eggs (thịt kho), Vegetarian stir fry egg noodles (mì xào chay), shrimp salad (gỏi tôm), and fresh fruit. On the dining table, there is a small bowl of dry rice for the incense sticks, three bowls of rice for my ancestors (one for my dad’s side, one for my mom’s side and the third is for all other ancestors), water glasses, candles and the same variety of foods as on the entryway table but in addition, there are also Vietnamese mung bean dumplings (bánh ít trần).

Tradition goes that when ceremony starts, each person always prays and greets Buddha first with 3 bows (ba xá) and 3 prayers (ba lạy) at the alter, then we move over to the entryway table and ask the Saint of the Property, permission (xin phép) to invite our ancestors to come and celebrate Tết with us with 2 bows (hai xá) and 2 prayers (hai lạy). Then at the dining table, we invite our ancestors to come and celebrate with us with 2 bows (hai xá) and 2 prayers (hai lạy). After each request, we each place one incense (cây nhang) into the designated dry rice bowl. At the end of the first round of bows, each person will visit each table again to ask permission to leave the ceremony, but using the same amount of bows and prayers per table that was used in the first round. This second round of bows and prayers will release the person to go on with their day as they please.

After the Tết ceremony: (Day 1)

DSC_3817DSC_3818DSC_3819

The bows, prayers and the placing of the incense sticks are repeated each morning for three days (ba ngày Tết), during the three day celebration. At the end of the three day celebration, there will be another feast that will be the same set up on each table and on the alter in which we bid farewell (tiễn đưa) to our ancestors.

In the late evening (close to midnight): (Day 1)

DSC_3836DSC_3829DSC_3826

In the late evening, we celebrate the New Years Eve (Cúng giao thừa) by lighting the alter candles and  welcoming the new year. This ceremony includes three separate steps by the owner of the home. The first prayer (lạy Phật) takes place at the alter to Buddha with 3 bows (ba xá) and 3 prayers (ba lạy). Then the owner will step outside on the front porch of the home and prays to Heaven and Earth (cúng trời đất) with 3 bows (ba xá) and 3 prayers (ba lạy) The owner will then come inside to the alter and will pray to the lord of Heaven and Earth (lạy trời đất) with 3 bows (ba xá) and 3 prayers (ba lạy). The owner of the home will then place three incense into the rice bowl at the alter after these last three bows are completed. This last set of bows will end the ceremony of welcoming the new year.

 This is an overview of what the set up is for my family for this year. There are traditional baked goods missing from this set up such as Bánh chưng (Vietnamese rice cake which is made from glutinous rice, mung beans, pork and other ingredients) and  Bánh tét (savoury but sometimes sweetened cake, made from mung bean or mung bean and pork filling), as well as tea in addition to the water glasses. Each family has their own variation of what foods they cook or how they set up their ceremonies, this is just my family’s set up for this year.

So,  Chúc Mừng Năm Mới! (Happy New Year) I wish you all a healthy and happy new year with plenty of wealth and triumphs throughout the year 🙂

Recipe – (Vietnamese Braised Pork with Eggs)

Thit kho with hard-boiled eggs (Vietnamese braised pork) - great with rice and popular on Lunar New Years!

This thịt kho recipe is a low and slow braise so the meat is going to be reeeeally tender. In this recipe we’re going to use pork belly because the fat on the meat tastes awesome! If you can get pork belly with the bones, you’ll have even better results. My ideal ratio of pork for this dish is actually 1/2 pork belly and 1/2 of a leaner cut like shoulder.

Hard-boiled eggs for thit kho - boil and peel them first!

Near me in Southern California’s Little Saigon, I hear you can get a higher quality of pork belly at Quang Minh Mini Market. It costs more for the belly, but there seems to be a consensus that its worth the cost–something I need to check out soon!

Here are the brands I use for the seasoning: Rico coconut soda, Kikkoman soy sauce, and Three Crabs Brand fish sauce. The thick soy sauce brand is Koon Chun, to be used in a pinch.

thit kho seasoning

As a kid I enjoyed mashing the yolk with the rice and spooning sauce over it–it’s fun! This dish is commonly eaten with a side of dua chua (pickled mustard greens) which provides a fresh and crunchy balance.

Chopped yellow onions for thit kho, to add another layer of flavorNotes:
I have tried adding slices of yellow onion too and it adds a nice layer of flavor to this dish. You can remove the onion at the end of the braise if you prefer since it will have given up all its flavor to the broth. For the seasoning in this thịt kho recipe: tinker with the soy sauce, fish sauce, and salt after the liquid has finished reducing, to taste.

Thit kho with hard-boiled eggs and pickled mustard greens

5.0 from 2 reviews
Thịt Kho – Vietnamese Braised Pork with Eggs
Prep time
10 mins
Cook time
2 hours
Total time
2 hours 10 mins
Author: Hungry Huy
Serves: 5-6
Ingredients
  • 2 pounds of pork belly, cut into 1.5″ cubes
  • 8 hard-boiled eggs
  • 6 ounces coconut soda (I use Rico brand)
  • 3 tablespoons fish sauce
  • 3 tablespoons soy sauce (or replace this with fish sauce)
  • 2 teaspoons salt
  • 1 yellow onion, cut into large pieces (6-8 will be fine)
  • 4 tablespoons sugar for the caramel color (nuoc mau). This is to deepen the color of the dish. Depending on how dark your caramel sauce gets, you may not need to use all of it. In a pinch, you can use about ⅕ teaspoon of thick soy sauce instead, but the caramel sauce will tastes better.
Instructions
  1. Cut the pork into smaller pieces. I like 1.5″ cubes so it cooks slightly faster.
  2. Bring 2-3 quarts of water boiling on high, or enough to fully submerge the pork.When the water’s boiling, add the pork for 1-2 minutes just to clean it. Drain then rinse the pork under running water until the water is clear.
  3. Add the coconut soda, soy sauce, fish sauce and salt to the pot.
  4. Fill up the pot until the water just covers the pork. Turn the heat to high.
  5. When it hits a boil, drop the heat until you still see a slight boil, maybe about about 25% heat and let it simmer uncovered for about 1.5 to 2 hours. Check and stir the pot every 20 minutes. The longer you cook it, the softer the pork gets. Leaving it slightly uncovered lets the liquid reduce so you get a nice concentrated sauce later.
  6. Make the caramel color and add it to the pot.
  7. Make the hard-boiled eggs: add to a pot and cover the eggs with cold water by 1 inch. Bring to a boil on medium-high heat. Remove from heat and let it sit for 8 minutes. Cool in water then peel. Add the hard boiled eggs to the pot of pork in the last ~30-40 minutes of cooking.
  8. When there are about 30 minutes left on the timer, add the eggs. Eventually we want the liquid to reduce to about ⅓ or ¼ of the original.
Like this recipe? Subscribe to my newsletter!

Comments

  1. SK says:

    Good job :) A good food in Tet’s Days at Vietnam, however, eating it in normal days is ok ! ^^

    • Huy says:

      Year round is definitely okay with me too :)

  2. Huy Vu says:

    Thanks! Just wish I had some Dua Cai Chua to go with this. =]

  3. daisy says:

    its so hard to find vietnamese recipes i understand and use online. more more more.

  4. Huy Vu says:

    =] sure thing.

  5. Jessica says:

    This reminds me of a Korean side dish called “Jang Joh Rim.” I wonder if they taste similar!

    • Huy says:

      Yeah it seems a lot of Asians share a similar variation of this dish!

  6. jason says:

    Huy, do i cover the pot with a lid? or leave it open?

    • Huy says:

      You only need to cover it slightly at the start so the liquid can reduce. Towards the end you can probably remove the lid entirely–adjust as needed.

  7. Jennifer says:

    Really great recipe, the step by step pictures are really appreciated. Thank you for sharing, and keep them coming!

  8. Jen says:

    Similar to adobo in the philippines:) ill try this recipe..

  9. Shay says:

    A friend made this as a comfort meal for me once and I loved it!
    Now I can try making it for my family. Wondering if this needs to be simmered covered with a lid or left open to boil? Thanks

    • Huy says:

      Lid open mostly, to reduce. If the meat is still tough you can add water as needed and continue to boil uncovered until it reaches a sauce thickness you like.

  10. LT says:

    This is way better than the Filipinos’ adobo.

  11. Eric says:

    looks similar to adobo but taste way different to adobo trust me this dish is heaps tastier

  12. steve says:

    make sure you use good fish sauce, like the one pictured above.

  13. Linda says:

    I love the pictures and the steps are very similar to my notes from my mom’s cooking lesson to me. The only thing is I just cooked it today with the country style boneless ribs and I compared it to the pork belly meat. Somehow the rib meat was more tough. Is there a way to make it more tender? I cooked 2hrs as your recipe dictates.

    Also, many people asked & I wonder also, do you cook your pot covered or uncovered?

    • Huy says:

      I cook it uncovered so the liquid can reduce (evaporate) to an amount I like. If you see it reduces too much you can put the lid back on or add some water.

      As for toughness of the meat, different cuts will vary in amount of connective tissue. Just cook it longer if its still too tough. At first I was afraid to overcook it, but giving it more time has always resulted in tender results. Just check it every 15 minutes or so.

  14. Tracy Le says:

    Just tried your recipe. Turned out so awesome. Thanks!!! :)

  15. foodiegal says:

    Is that a typo? This doesn’t take 20 hours does it? If so, can we cook this in a crock pot?

    By the way, I’ve had this dish many times at parties and IT IS TO DIE FOR! I love that the ingredients are simple and so are the directions. Is there a substitute for the coconut soda, if I’m not able to find it? Thanks!

    • Huy says:

      I’m DYING, that’s hilarious!! Yeah I meant to say 2 hours–oops, that’s been updated and thanks!

      The best thing you can use is fresh coconut juice, coco soda 2nd, then 3rd is cola or lemon-lime soda. Hope that helps.

  16. TrinityTrinh says:

    Can you substitute chicken or beef? I do not eat Pork. I’m sure it won’t taste the same but thought I would ask

  17. Trinity trinh says:

    Have you or can you substitute chicken or beef. I have taken pork out of my diet.

    • Huy says:

      Hey Trinity, I personally haven’t tried it but I bet it would be pretty good too. I’ve had this with tofu instead of meat and really enjoy that version too!

  18. Amy says:

    Super easy recipe to follow, and ended up delicious! I used pork shoulder only because the local grocery store didn’t have any pork belly left, and the end product was still absolutely delicious! The meat was so tender and flavorful without being too salty. Thanks for sharing this recipe!

    • Huy says:

      Hey Amy glad to hear you liked it! Yeah you can really use any cut of pork you want and it still turns out pretty well :)

Speak Your Mind

Name *

Website

Rate this recipe: 

Notify me of follow-up comments by email.

Tết 2016- Lunar New Year

02.03.2016

0800

DSC_3535
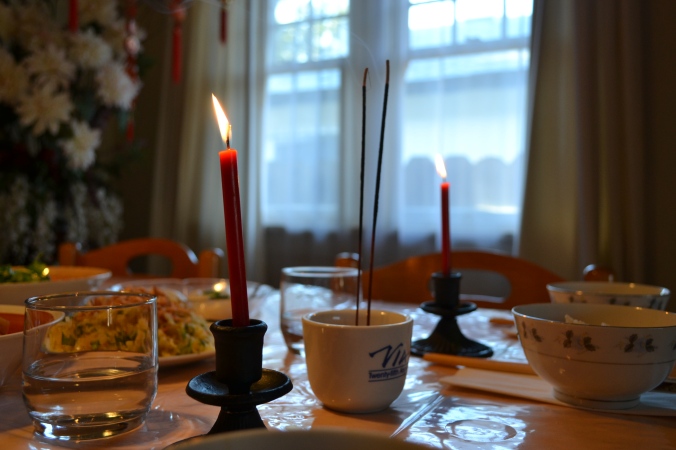
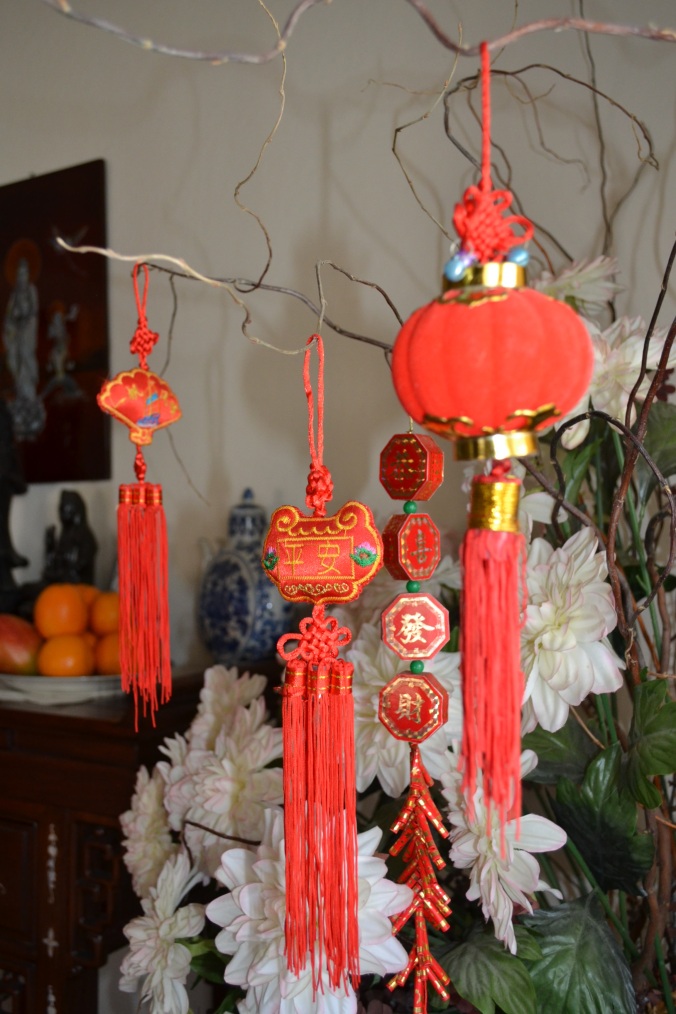
Tết is the most important celebration in the Vietnamese culture.

It is also, one of my favorite holidays, Christmas being the other. I love Christmas because it marks the end of the year and that the new year that’s about to come. A new year brings new beginnings, new experiences and new challenges.

Tết derives from a shortened form of Tết Nguyên Đán, which is Sino-Vietnamese and it means “Feast of the First Morning of the First Day” and it also marks the arrival of the spring season, based on the Vietnamese variation of the Chinese Lunar calendar. (The Chinese Lunar Calendar is four hours ahead of the Vietnamese Lunar Calendar.)

It is a time when families reunite and visit one another. Some may even go to temple and start letting go of their troubles from the last year. It is a time when customs such as visiting a person’s house on the first day of the new year, ancestor worship, wishing New Year’s greetings, giving lucky money to children and elderly people and even opening a shop.

As a child, I really loved this holiday. It was the only time when certain special dishes, desserts, and snacks were made and consumed. I also loved receiving money because… who doesn’t love that. Heading south to meet up at my aunts house was a thrill. I knew I would get to see all of my cousins and her little Chihuahuas. Although, the house had to fit up to 6 families which included, cousins, uncles, aunts, grandparents, the food and the room to be able to move around the food table. In total, there was always about 12 kids at these gatherings. It was still awesome, we would always gather in one room to play a board game and we’d somehow would get into arguments about it. The boys never wanted to loose and I (being 1 of the 3 girls there) never really cared. After the arguments, we would all go to the nearby park and play as we waited for to hear the jingle of the local ice cream truck.  Then we’d all bombard our parents for ice cream money. It was a great time, and by the end of the party, the cousins seemed to part ways as best friends. We always knew we’d have to wait another year to do it all over again, and it never felt fair.

Now that I’m older, and I’m on the giving end of the crisp red envelopes filled with money, I’m realizing now, that working during the year means that I have to save up for Christmas and Tết because NOW I’m realizing how much money my relatives forked out for each kid. I’m impressed that they did that for all 12 of us- EACH YEAR.

Truth be told, I don’t spend a lot of money, and the joy of receiving money and eating food as a kid is a wonderful memory that I still hold dear. Also, kids stop receiving money when they start working, so you’re really looking at forking out those red envelopes from ages 5-16- not too bad right? And now the time of the year has come again, to celebrate the new Lunar calendar and new beginnings.

Reuse Items

02.01.2016

0800

I’m located in Northern California and recently we’ve had some rain. It’s good situation, in fact it’s a great situation. Our seasons have been delayed in the past decade that we’re always thankful that we can replenish our water supply when the opportunity arises.

However, this situation also brings other issues to the area such as floods, landslides and residential water damage. There are five rain gutter spouts attached to my home and one of them releases water a little too close to the exterior structure of the house. There are splash blocks that are sold to be placed beneath the downspout elbow, which helps to disperse water away from the foundation. But I also don’t like to go out to buy new items if I can make it at home.

So my solution was to take an old metal paint roll pan and cut two slits on the wide-sided end, and about six inches apart. This section cut would create the gap where the water could exit the pan. I hammered the new piece of metal down and then slipped it under the spout.

Here was my solution:

DSC_3501DSC_3499

For those of you who may have the same issue, I hope this post helps.