End of the Vietnam War


04.30.2016

0800

20130911-lens-vietnam-slide-7T3P-blog480

Horst Faas/Associated Press. A farmer helplessly held the body of his dead child as South Vietnamese troops looked on. March 19, 1964. The child had been killed as government forces pursued guerrillas into a village near the Cambodian border. Lens Blog, New York Times

Vietnam War November 1, 1955 – April 30, 1975 (19 years, 5 months, 4 weeks, 1 day)

There’s so much history involved with this was that it’s too much to write about in one blog post. My family is from South Vietnam and my father was drafted into the South Vietnam Army. He was also held captive for 3 years by the Viet Cong after the Fall of Saigon. He escaped and was deemed a POW. He doesn’t speak much of his experience either, I think most POWs don’t. It was a rough time in history, for everyone. There were protests in the United States, families were torn apart, and refugees fled seeking asylum in the US. There was so much chaos and pain- it’s unimaginable.

It wasn’t until the age of 14 when my mom started revealing to me the details of our family members, including her escape from the Viet Cong.  She told me “You would run until your feet would bleed. You can see bodies dropping around you as the Viet Cong shot the refugees trying to escape. They didn’t care. You ran because your life depended on it and you hoped the next bullet wouldn’t hit you. Each time you ran from them, you would lose track of your loved ones because running in a group just means you’re a larger target. You had to disperse, to create the illusion of smaller moving targets. Dispersing meant you would be alone, but you could save your life as well as the others.” She attempted to escape 4 times because during the first 3 times, someone had informed the Viet Cong and the location to meet up was compromised.

I have an aunt, who always stood out in my mind. She was so sweet and doted on the kids when we would visit. She made you feel like you were the #1 kid in the whole wide world. During this conversation, I asked my mom why she never had kids, she was loving and kind and seemed to have so much love to give. My mom revealed to me that she once had two young boys and a husband when she was on the boat that was headed to the US. On the boat, the men were on the top deck and the women and children stayed on the bottom deck. The boat had approached a Korean oil tanker and the captain asked if they could board the tanker. It didn’t make any sense that he wanted the passengers to board the tanker because the refuges were not allowed into Korea, they were not granted sanction in Korea. For whatever reason, the captain made his decision. Unfortunately, as the boat got closer to the oil tanker, the wave that it had created while cutting through the ocean water, rocked the boat and shook it. The wave was strong enough that people were thrown overboard and injuries were sustained on the top and bottom decks. At the exact same time, my aunt was climbing the access ladder, with one of her boys in her arms, the other was ahead of her on the ladder. They were trying to get to the top level to be with her husband so they could be ready to board the oil tanker.

When the wave had hit the boat, she was knocked off of the ladder and so were her boys. When she woke up, she was on the lower level of the boat again, lying next to other victims who were recovering from injuries attained during the shake up. Another refugee informed her that they were rolling the deceased bodies into the ocean. They couldn’t carry the dead across the Pacific Ocean because they would rot horribly and the damage they sustained from the wave was already an issue. She informed my aunt, that my aunt had been placed with the dead bodies, because they thought she had died, but after another check, they realized she was breathing- so they brought her downstairs to recover. When my aunt got to the top level, she saw that her husband and her two sons were among those who were deceased. When the time came for her husband and sons to be rolled into the ocean, she helped roll them off of the boat. And that was it, they were gone.

When she arrived in the US, she was alone, and didn’t know any English. Inevitably, she was placed in a psychiatric facility for some time. So many had passed during that event, I’m not sure she ever recovered from the incident. I don’t know if she had time to mourn the loss of her family, or time to heal from the emotional scars, but I do know that she felt lost and alone in a strange land. She eventually met my uncle whom is now her current husband and they’ve been married ever since- but behind her smiles, she was never the same again.

The reason why I tell this story, is that there are so, so many stories such as that one, which have never been told. As first generation American, I have no idea what it took for my relatives to come here. Guerrilla warfare is hand to hand combat and  if you couldn’t stand your ground- you would easily be killed by the hands of the other. I look at my relatives now, and I wonder what stories they have not told. I wonder what life was like, the fear they felt as they watched their country collapsing, their homes being destroyed and the future filling up with unknown endings.

I have a deep respect for life and people. Everyone has a story. Everyone has a past. Please ask, learn and spread that knowledge. Every single one of us has a story, perhaps not about war, maybe trauma, maybe a moment that changed our lives- but every single person has a story. I always knew war was bad, and it took 14 years to finally hear the details of how bad it was through my  mom’s eyes. Some stories are so painful they they can’t be repeated, but for the stories that can, I hope each person takes something away from it.

130831192539-17-iconic-vietnam-napalm---restricted-horizontal-large-gallery

South Vietnamese forces follow after terrified children, including 9-year-old Kim Phuc, center, as they run down Route 1 near Trang Bang after an aerial napalm attack on suspected Viet Cong hiding places on June 8, 1972. A South Vietnamese plane accidentally dropped its flaming napalm on South Vietnamese troops and civilians. The terrified girl had ripped off her burning clothes while fleeing. The children from left to right are: Phan Thanh Tam, younger brother of Kim Phuc, who lost an eye, Phan Thanh Phouc, youngest brother of Kim Phuc, Kim Phuc, and Kim’s cousins Ho Van Bon, and Ho Thi Ting. Behind them are soldiers of the Vietnam Army 25th Division. (AP Photo/Nick Ut) CNN, 25 of The Most Iconic Photographs

Simple Travel Bath Bag


04.27.2016

0900

Most of my travels have taken me overseas and only a few times have I traveled around the United States. My “close to home” travels usually involve a surfing trip or a snowboarding trip, which doesn’t involve too many flights. Some of these trips are day trips and some are weekend trips. Because ‘bathroom essentials’ seemed to be where I had to make the most adjustment when it came to my zero waste journey, I thought I’d go over what I usually carry in my travel bath bag.

DSC_3851DSC_3852

For the sink space area, I pack my:

  1. Bamboo toothbrush
  2. Dental pick
  3. Dental floss (packaged in a paper container)
  4. 1/2 bar of soap (I cut my normal sized bars and bring it along)
  5. Deodorant crystal
  6. Collapsible stainless steel cup
  7. 2.0 oz. bottle of lotion
  8. 2.0 oz. bottle of baking soda

For the shower area, I pack my:

  1. 3.0 oz bottle of Shampoo/conditioner
  2. Pumice stone
  3. Empty stainless steel water bottle (missing from picture)

For the “In case” situations, I pack my:

  1. Diva Cup
  2. Shewee With Extension

I use the bar of soap for the sink area and the shower area, it seems to travel back and forth during my travels. I don’t mind mostly because I shower at night anyway and so I only move it over when I need it. I actually bring along a concentrated amount of my shampoo and conditioner and I also back an extra, empty, stainless steel water bottle to dilute it into. This way, I can definitely have enough shampoo & conditioner for longer trips.

I use the squeezable travel tubes from  GoToob by Humangear. I chose these because they have built in labels that can be rotated and changed per use, as well as the large opening. These tube are made of silicone and are very durable. The large opening allows the owner to change out the product or add more product in easily . It also makes for cleaning the inside of these tube easier as well.

The other items missing from this series of images are my epilator and makeup. (I’ll post what is in my make-up bag in a later post). Those are items I just pack separately. I don’t need much when it comes to  bathroom travel supplies, mostly because this is the equivalent to what I use at home. All in all this bathroom bag is sufficient enough for me to be satisfied when I’m traveling. It’s a simple bag and definitely not many essentials, but these items seems to satisfy my needs and bathroom routine when traveling.

DSC_3853

Check out these post from some other bloggers about traveling:

Hand Sewn Repairs


04.20.2016

0845

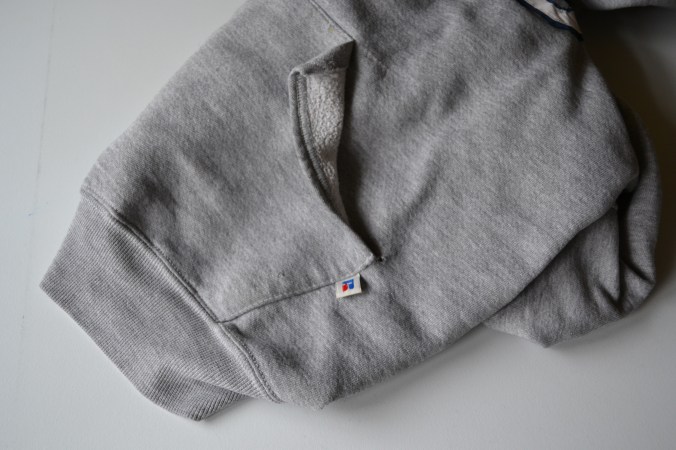
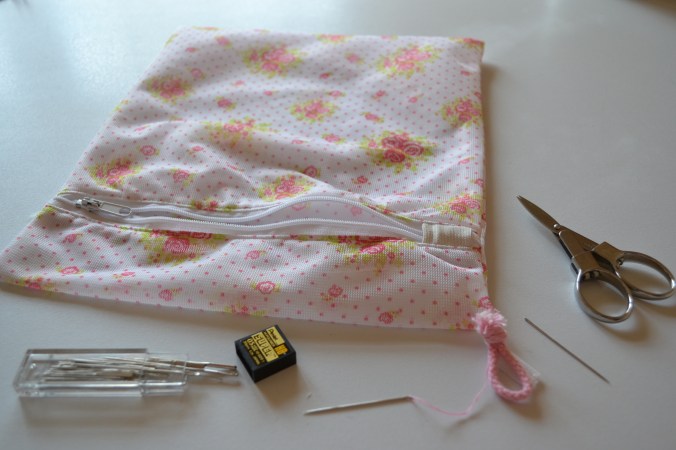
Although I do enjoy using a sewing machine to stitch together projects, I initially learned how to hand sew as a child. Hand sewing isn’t as daunting as it sounds, although it takes a little bit of practice, anyone can learn how to sew by hand. I hand sew items when I need a quick fix or a temporary fix. As a person who lives a zero waste life, repairing clothing helps in the fact that I can hang onto clothing that I still love to wear. Learning to repair items is essential to living a zero waste life for that fact that I simply don’t own that many items but also the fact that I don’t want to create more waste in the landfill.

Granted, once a piece of clothing or item is beyond repair, I will have to somehow repurpose it or it becomes trash. Even when I’m ready to donate my clothes and buy second hand clothes, I still prefer to repair the item before donation- there’s no reason that the next person should receive an unkept possession.

DSC_4102DSC_4104

Sometimes I need to edit products for my daily needs so hand sewing is a better option than using a sewing machine. After I’m done, I simply add my leftover thread to my trash pile. Although the leftover thread is inevitable, it’s a better alternative than going out and making new purchases. I have quite a bit of leftover thread in my trash pile so I plan to find an alternative use for it.

DSC_3734

DSC_3737

I like to use the running stitch, hemming stitch and the backstitch. I favor the running stitch because it’s a simple stitch that is clean and easy to make. The hemming stitch is good for joining two layers of material together, when you want to hide the stitch seam. The backstitch is good for a more secure version of the running stitch. I use the backstitch on items that may have more weight on either side of the stitch, or when there s a chance that the stitch might come apart due to the materials being pulled in opposing directions.

There are many types of stitches to learn about and if you can master just one or two of them, you can save a great deal of time and money. Learning how to hand sew items is a skill that anyone can develop and learn, it is very easy once you understand how fabric is held together and why certain products use certain stitches. A lot of the times, picking out the right stitch is simple as just copying what the manufacture used on your product.

Types of Stiches

My Sewing Kit


04.18.2016

0845

For my sewing kit, I use a  3-Tier Stainless Steel Food Carrier by To Go Ware. It is also known as a tiffin set, which is a nifty lunch box system that hails from India. For kits or sets that have many small items, I like to use these types of container systems due to the fact that these containers take up very little space and can be stored away quickly. This food carrier also came with a small cylindrical snack container as well.

DSC_3722

In my top tier, I have a few extra zippers, some extra safety pins, my white LYRA Aqua Color Water-Soluble Wax Crayon, and a measuring tape. I also have a small coin purse that contains extra buttons. In my middle tier, I keep extra elastic bands and the small snack container, which holds my Pearlized Head Straight Pins by Singer. My bottom tier is where I keep my extra thread, sewing needles and my metal finger thimble. I usually keep only three different colors of thread, which are black, white and grey. I only keep these colors on hand for the fact that I can match pretty much any sewing stitch to any one of those colors.

In addition to the 3-Tier Stainless Steel Food Carrier, I also have a pair of 8″ Knife Edge Dressmaker’s Shears and a seam ripper. This sewing kit is used for mostly hand stitching and repairs. I do have a sewing machine that I borrow and that comes with its own set of supplies as well.

Knowing how to stitch and repair is essential in the health and life of my clothes. I prefer to repair my clothes instead of going out and replacing it with a new piece because each piece that is in my wardrobe is very special to me. Even when I decide to replace a piece of clothing, I still want it to be in good condition for the next owner. I never understood how much sewing would become a part of my clothing maintenance, I always just considered that keeping my clothes clean was good enough. Knowing a few types of stitches will save you a lot of frustration and money in the long run.

DSC_3723DSC_3724DSC_3725DSC_3726

Borrowing Tools


04.13.2016

0900

As a child, I grew up watching my father fix the house little by little using his collection of tools. This childhood observation conditioned me to understand that owning tools was essential to get any job done around the house. However, any tool owner knows that whatever tool you buy, it comes with a warranty and there will always be a more powerful version of your tool out on the market somewhere at some point in time.

Owning tools can be quite costly and takes up a great deal of space. If you are a collector of tools and owning tools is essential to your day-to-day routine, then by all means, I think keeping them is the best decision. However, I am not a part of that population. I love to fix up my home and there’s a great satisfaction when I finish a job, but I don’t like to maintain tools nor do I like the amount of space they can take up.

The concept of borrowing, sharing and renting tools is not new, in fact, it’s quite old. There’s a level of trust and blind faith you must have in order to hand over your valuable tool to someone who may or may not know how to use it correctly. This idea of sharing tools creates a larger library of tools for any community in which the members understand who owns which tools and opens the communication lines between neighbors. By teaching each other how to use tools properly may in fact bond a community in a very unique way. Home owners, renters and potential home owners understand the frustration of maintaining a home so that bond in itself is unique. I personally have a numerous conversations with friends and family about how I prepare my home for each season of the year. Between the list of what tasks needs to be done to what tasks have yet to be done, neighbors young and old understand the need for certain tools and how to go about obtaining them.

Sometimes you only need to use a tool once or just use a specific tool once in a while so renting it may be a better idea. Some tools are not expensive and by owning all of the tools that you could possibly need, shuts you off from your neighbors. Granted, perhaps you’re the guy who everyone goes to in order to borrow tools, and in that scenario, you’ll be everyones’ ‘go-to person’ when it comes to tool inquiry. When you borrow/share/rent tools, it forces you to step outside and talk to one another.

We all know how to survive on our own, some of us are better at it than others, but part of me asks the question, how do we survive with each other? Borrowing and sharing tools is a small task to conquor “surving with one another”, but I think it opens a door of communitcation with one another.

There are programs designed to allow you to rent tools such as Loan-A-Tool from AutoZone or Cresco Equipment Rental.

Tools I borrow:

  • Dewalt Mechanics Tool Set
  • Dewalt Reciprocating Saw
  • Ridgid Cordless Drill/Driver & Drill Bits
  • Single Bevel Miter Saw
  • Sawhorses
  • Power Sander

DSC_4192DSC_4189DSC_4188DSC_4187DSC_4186DSC_4185

Food And Bath Storage Containers

04.11.2016

0800

When it comes to using reusable containers to buy or store food in, it became a challenge due to the fact that bulk foods come in a variety of textures and consistencies. After a few trials, I finally found what work and did not work and I came up with these solutions.

32 oz Ball Quart Jar, Wide Mouth:

I use these jars to store my liquids in, and when I say “liquid”, I’m talking about Dr. Bronner’s Peppermint liquid soap. Because those liquids are quite viscous, these jars are easy to fill and clean out when needed.


DSC_6232

Ball mason Jars:

I use ’16 oz, Ball Canning Jars, Regular Mouth with Lids’ for bulk seasonings such as sea salt, peppercorn, flax seed, honey and almond butter. I  also use these jars for my bulk bathroom products such as my face lotion and body lotion. These jars are great due to the fact that they’re designed to handle wet ingredients over time, and they can also be used for canning as well. You can read more about Ball and the history of the company and their products, click HERE.

I also fill up my mason jars with olive oil, balsamic vinegar and fresh almond butter. In the beginning of this journey when I first started buying bulk liquids, I noticed it was easier to just fill up the mason jars and then just put them away when I got home. I know it doesn’t “look” ideal, but to transfer the liquids into tall and skinny bottles like my Dr. Bronner’s Liquid Soap, is one extra step I prefer not to take.

DSC_4174

DSC_6237.JPG

I also love using Bormioli Rocco Fido Jars for containing my other bulk foods. I use the 1 Liter jars for bulk teas and a variety of snacks and the 1.5 Liter jars for larger supplies of bulk ingredients such as nuts, whole wheat flour, cane sugar, cranberries, mini peanut butter cups and other bulk snacks. I use the 2 Liter jars for dried beans, baking soda and coffee. For my largest bulk items such as brown rice and oatmeal, I use the 4 Liter jars. One of the websites I follow suggests to use these types of jars for wet ingredients, but I’ve noticed that the gasket that comes with these types of jars, absorbs odors and stains easily. If you prefer to stick to only one type of jar design, then I say go for it. However, odors are a nitpicky tick of mine. It just seems strange to me to open a jar almonds and smell lotion, or when you open the jar with cane sugar and you smell balsamic vinegar. By using the jars for dry ingredients, I can switch out my bulk supplies and not worry about leftover odor from a previous use.

When I first researched on different types of canning jars with hermetic seals, a few different brand names popped up such as Le Parfait, Kilner and Bormioli. The reason why I chose Bormioli was because of their design structure for their jars. Most of the jars I researched on are designed with a round base, which actually wastes space. Bormioli uses a square shape base which utilizes shelf space and will organize easily next to one another. Bormioli has a long history of creating quality glassware while using high quality materials. You can read more about their history here Bormioli Rocco USA.

DSC_4175DSC_4176DSC_4177DSC_4179

I also use PYREX tupperware to contain items I find at the grocery store salad bar, but I also use these to store my lunches to bring to work. I did bring the 1 cup, 2 cup and 4 cup bowls to the grocery store to carve their tare weight into the lids, because I knew I would use them eventually. It did feel a little strange at first, lugging around glass tupperware, but using the PYREX bowls was essentially the same as using one of the grocery store disposable paper containers. I knew that my extra effort would count in a small way- in the long run. At the salad bar, I’ll fill up my PYREX bowls with olives from the olive bar, hummus, potato salad and anything else I feel like indulging in.

I really like PYREX because it’s made of tempered glass and it’s easy to clean, store and you can use these to cook in toaster ovens as well as larger ovens.

DSC_4181

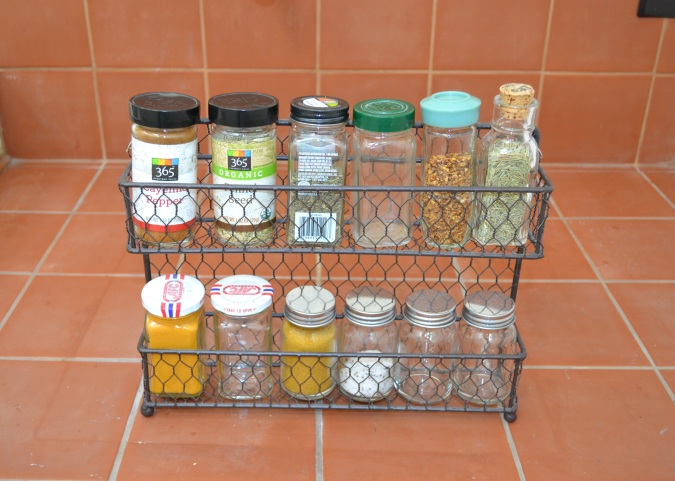
For my spices, it is a collection of many types of seasoning jars I’ve collected over time. I did buy a set of seasoning jars, and those are on the bottom row. I initially did this to test out how to go about recording the tare weight as well as how to fill them up. However, it did seem simpler to just reuse the rest of my seasoning jars. They do all have different tare weights and I carved each tare into each lid. I do suggest to use screw cap seasoning bottles as they are quite secure when closed correctly.

DSC_4178

I hope this post clears up how I go about organizing and designating my bulk items per container. I honestly wished I had read about some type of reasoning and method before I started my journey because a few mistakes were made along my journey. However, now that I have figured out my system, I wanted to share it with you. So happy bulk shopping and I hope trips to the bulk sections are more efficient for you.

Creating Working Surfaces

04.06.2016

0600

Although furniture is designed for specific uses, there are a few opportunities when you can design multiple functions from one piece of furniture with a few design hacks. Using or having a flat surface is essential in pieces such as tables and desks. If the furniture piece is going to have items set on it in a balanced manner, you’ve got a table style of furniture. I approach the need for flat surfaces in a few different ways.

When it comes to the need for a coffee table when I’m sitting at the couch, my ottomans become my table. I either flip the ottoman lids over and use the back as the flat and hard surface to set items on, or I use a tray on top of the ottoman to give it more stability. I’ll usually use the tray if I need to serve guests and  if I need to move many items all at once (and when the clean up process is also all at once). If I’m alone I’ll usually bring the items over individually.

DSC_3877

DSC_3878

When it comes to more functional use of surfaces, I utilize my drawers into pull out surfaces as well. As you can see, I place my cutting board across my drawer to create a place to use it. And because I don’t need to use that particular drawer often, the cutting board stays where it is. If you use this method, as long as your cutting board is sturdy and there’s enough support on at least three sides of the board, you can utilize the drawer a a location for your cutting board. Keep in mind that you may not want to apply a great deal of pressure when using your cutting board, while it’s balanced on the drawer edges. The further you pull out your drawer, the weaker the drawer attachment is to it’s rightful sliding hinges. Basically, if you’re going to carve a heavy food product or dish, please move it to a sturdier surface. When it comes to the other drawer next to it, I use a clear cutting board, which I’ve had for awhile, and slide it out of the way when I need to access the silverware.

DSC_3868

DSC_3867

Materials:

  • Two pillowcases
  • Safety pins

My bedroom came with a closet system from IKEA, which was also designed with a roll out pant rack. I  hang up my coats and a few other clothing items, but I prefer to fold the rest of my clothes. Folding clothes is easier for me due to the fact that I simply don’t own a lot of clothes so I can see everything at a glance and folding is a quick task. This closet system does come with an extra shelf to be placed in the closet system, but I wanted to try out a few different design options. Currently, the closet system does not have a shelf in the location of the pull out pant rack, so I simply used my large cutting mat as a substitute. I’ve had this cutting mat for years because of my degree and I still use it. Granted, I can’t place heavy items on this generic shelf, but I also don’t need to.

When I was playing around with this design, I had used two pillowcases, attached with safety pins and I stretched the pillow cases over the pant rack. I didn’t stretch it to the point where I would start bending the pant rack arms,  but enough where the pillowcases fit just right. That method actually worked pretty well. If you want to test out the pillowcase method, it will take some trial and error. It really depends on how tight you want the pillowcases to fit over those bars. These two methods worked for me because I don’t own a lot of clothes and for the ones I needed a flat surface to place them on, it wasn’t a heavy  amount, so the pant rack wasn’t damaged.

DSC_3870

DSC_3873DSC_3872

My Emergency Kit

04.04.2016

0845

I have a small emergency kit and most of it is pictured here. In any emergency, it’s always a good idea to keep certain items on hand and ready at a moment’s notice.

DSC_4732

In my small electronics bag: (green flowered bag)

  • Small battery operated radio and clock
  • Whistle to signal for help
  • Extra AAA batteries
  • Flashlight/hand crank radio accessories

In my first aid kit:

  • Gauze
  • Medical tape
  • Styptic pencil
  • Mercury- Free Oral Thermometer
  • Compact scissors
  • Bandage

Items that are not pictured are:

  • Water, one gallon of water per person per day for at least three days, for drinking and sanitation
  • Food, at least a three-day supply of non-perishable food

I also have a flashlight/hand crank radio, butane lighter with butane gas refill and candles. I use bandanas as dust masks to help filter contaminated air.

This is just a simple overview of what I have in my emergency kit for living in the city that I live in. Understandably, the most common natural disaster in my area are earthquakes, so preparing for all natural disasters wouldn’t make any sense. Depending on each family’s’ dynamic, this kit is essentially  for only one person. There are a lot of websites out on the internet that suggest to have a large emergency kit at all times, but ironically, my kit is based on FEMA’s outline. (you can find it HERE). All of the items listed may not apply to you but the list is a comprehensive one. Due to the fact that I’ve experienced a few earthquakes in my life, these items are exactly what I need in case of an emergency. It’s a slim and small kit, but it has been working for me. This post was to simply give an overview of what I keep in my kit.

DSC_3708

DSC_3707

DSC_3710