How To Reduce Waste In Your Home

08.12.2019

0600

Reducing the amount of trash that comes into your home is not as hard as it sounds. It might sound like a daunting task because we as consumers, buy a lot of packaged items that we bring into our home. However, it’s a simple process of elimination.

For instance, if you evaluate your kitchen items and everything you buy weekly, monthly, and yearly- that’s pretty much your entire list. For the yearly items, if you can find reusable alternatives, you can essentially eliminate your yearly inventory shopping.

Then, list all your weekly items that you tend to buy, and find reusable, non-toxic alternatives for those items. Your weekly and daily items are most likely the trash culprits. Half of the time, we don’t realize how many coffee cups we buy every day or even plastic packaged lunch items that we purchase daily. Eliminating the daily trash will help greatly reduce the amount of trash that enters your home. There are a lot of reasonable alternatives when it comes to kitchen items. Using cloth napkins in lieu of paper napkins, and using real dishware instead of paper plates can help eliminate the disposable trash output. You can also use real utensils instead of disposable utensils. You can bring a reusable coffee Tumbler when you go to get tea or coffee, so you don’t end up with a disposable cup.

A lot of people don’t know that the paper containers provided for us at grocery stores, and food establishments are lined with plastic, and those containers do not compost or bio degrade. The plastic layer, prevents it from composting completely. It’s a little bit like green washing because you may think your container is completely made of cardboard but it really isn’t. Using reusable items is a much better alternative, because you are in control of how much trash you are producing.

For your bathroom items, it’s the same process as evaluating your kitchen items. Go through your items and figure out which products you use and purchase, yearly, weekly and daily. Slowly replace the yearly items with reusable and sustainable options, as well as a weekly and daily items.

When it comes to medications or anything medical, I suggest that you consult with a doctor before you decide to eliminate certain products. I purchase sunscreen consistently. I live in California, where the sun is strong, and skin cancer is a real concern. I’m very aware that I am producing plastic trash with my sunscreen bottles. However, I would never want to put my health at risk just so I can proclaim that “My lifestyle is absolutely zero waste!”, and I wouldn’t want you to do that either.

Health concerns are very personal, so you know your own limit. If you can eliminate a plastic contained product and opt for a reusable version, than I think that’s great. Right now, I buy my conditioner, body lotion, bar soap, liquid soap, and tooth powder, in bulk. When it comes to sunscreen, face moisturizer and dental floss, those come in packaging.

You can use this evaluation process for the other rooms in your home. The biggest trash producers are the kitchen and the bathrooms. Some people have other rooms where they tend to buy a lot of items for, and those can be also evaluated in the same fashion.

This process takes time, and it takes self awareness to be consistent. Start slow and just work on an area or room in a certain amount of time. If you give yourself a time limit, staying consistent and motivated, becomes easier.

Plastic Packaging In The Kitchen

07.08.2019

0600

Even when I buy items in glass jars because I can’t find a refillable version of it, I always end up with these plastic shrink bands. It seems that zero waste is never an absolute. Sometimes when I do buy produce that is free plastic packaging, I’ll still end up with rubber bands or twist ties. The good thing is I can actually reuse those items, but it’s preferred that I don’t have to.

Most of my dry goods are sold in bulk bins, so I am lucky that I have the privilege to buy package free dry goods from bulk items.

During the process of transitioning over to a zero waste lifestyle, I knew that I would end up giving up a lot of foods that I enjoyed. I personally love potato chips to snack on, but it was one thing I knew I had to give up, since the packaging wouldn’t fit my zero waste lifestyle. I gave up a lot of snacks such as packaged cookies, packaged crackers and packaged candy. There were alternatives to these packaged items, such as certain bulk options.

When I realized I had to give up certain foods, I also sought out alternative food substitutes. There are good substitutes out there, but sometimes, seeking out the alternatives require more work than expected. Once in awhile I will indulge in a packaged food, and then that packaging will get added to my pile of trash for that year. During my journey, I did come across a company called TerraCycle. They team up with certain companies who participate in different recycling programs with TerraCycle. These companies offer recycling programs through TerraCycle, in which customers who purchase their products, can join their recycling program, and send back the packaging to the company for free. It’s an option, and the program change frequently, so checking their website updates is helpful.

I’m extremely lucky to have local bulk grocery stores, who provide the option of bulk shopping, so I can continue this lifestyle. Only once in awhile, I’ll need an item and the glass jar will have the plastic shrink band on it. If I can, I try to only need and use items that are only sold in bulk.

How I Remove Labels On Glass Jars

04.23.2019

0600

Tools:

  1. Stove/microwave to heat up water
  2. Extra old toothbrush
  3. Extra cup wider than your jar/ stove top pot

Materials:

  1. One jar with label glue still stuck to it
  2. Dr. Bronner’s liquid soap
  3. Baking Soda
  4. Water

So I’ve read online about a few tricks of how people remove sticky labels off of glass jars. I’ve read about the method of using olive oil along with baking soda, and then there’s the method of heating up the glass and peeling off the label. I don’t like to use excess oil to clean, because when you wash off the jar, the oil can clog up your plumbing pipes, over time. I have tried to heat up my glass to peel off the label, but it doesn’t always peel off completely. There is one method I’ve stuck to for awhile, but I don’t see people posting about it. My method is pretty simple and it seems to work for me.

I will first peel off the label so that the only film left is the paper and glue. Some jars use a plastic/nylon label and some use paper labels. I like to get rid of the excess label before I start to remove the glue and label. By removing the extra thick layer of label, the jar cleaning process goes by quicker, without any hangups during the process.

After that, I find an extra cup that my jar will fit into. If you can’t find a jar, at least find a pot wide enough, where the jar can be placed horizontally, inside the pot and completely submerged under the water.

I then heat up water in my stove top kettle. I heat it up where the water is pretty hot to the touch, but not scalding hot. The water doesn’t need to be scalding hot to be honest. The idea here is that the water, mixed with the soap, will loosen up the glue.

I’ll then pour the heated water into the larger cup, in between the larger cup and the jar, and a little bit inside the jar. The heated water around the jar is to help loosen the glue off of the jar and the water inside the jar is to weigh it down. I pour enough water into the cup, so that the label and glue are submerged under the surface of the water.

I’ll then drop a few drops of Dr. Bronner’s Liquid Peppermint soap into the water around the jar. I’ll usually spin the jar in the cup a few times, so the liquid soap is distributed more evenly. The soap, mixed with the hot water will loosen up the glue.

After about 30 minutes, I’ll take the jar out of the soapy water. Please be careful, because your jar might still be very hot from being submerged in the water. If it is still too hot to handle, let it sit for a bit longer so the temperature of the water cools off . DO NOT run the hot glass jar under cold water to cool it down. This will likely lead to your glass jar cracking or exploding under the drastic temperature change.

NOTE: Glass expands when hot, contracts when cold. If the exterior surface of your glass jar cools, while the inside surface of your jar is still hot, that creates an uneven thermal profile.  As a result, the surface of your jar is trying to shrink, but the hot inner glass prevents the surface glass from shrinking. This creates a powerful stress profile through the glass — the surface is trying to shrink, but can’t, so it is forced into tension. The hot core is trying to stay the same volume, but the surface is squeezing in, so the core undergoes compression. It’s not hard to figure out which section of glass wins the tug-of-war — the surface fails first. And a crack grows out of some microscopic scratch or flaw, growing and spreading until the stress is sufficiently relieved or the glass is broken clean through. 

SO PLEASE DO NOT RUN COLD/COOL WATER OVER YOUR HOT JAR.

Once it is a bit cooler to the touch, I’ll use baking soda to scrub off the glue, using an old toothbrush. I’ll scrub in circular motion, and periodically dip the jar in the soapy water to rise it off as I scrub my way around the jar.

This method has worked for me, when I’ve needed to remove sticky labels off of glass jars.

Also remember, glue is not permanent on glass. So if you’re patient and allow the glue loosen up, and continue to scrub using the baking soda, than you’ll end up with a clean surface. Sometimes there might be a little bit of glue left, but just continue to scrub it off with the baking soda and soapy water.

This was a simple post, but it was a method that I realized I had never talked about, but always used. It’s just glue; it’s not permanent and it’ll come off.

Food And Bath Storage Containers

04.11.2016

0800

When it comes to using reusable containers to buy or store food in, it became a challenge due to the fact that bulk foods come in a variety of textures and consistencies. After a few trials, I finally found what work and did not work and I came up with these solutions.

32 oz Ball Quart Jar, Wide Mouth:

I use these jars to store my liquids in, and when I say “liquid”, I’m talking about Dr. Bronner’s Peppermint liquid soap. Because those liquids are quite viscous, these jars are easy to fill and clean out when needed.


DSC_6232

Ball mason Jars:

I use ’16 oz, Ball Canning Jars, Regular Mouth with Lids’ for bulk seasonings such as sea salt, peppercorn, flax seed, honey and almond butter. I  also use these jars for my bulk bathroom products such as my face lotion and body lotion. These jars are great due to the fact that they’re designed to handle wet ingredients over time, and they can also be used for canning as well. You can read more about Ball and the history of the company and their products, click HERE.

I also fill up my mason jars with olive oil, balsamic vinegar and fresh almond butter. In the beginning of this journey when I first started buying bulk liquids, I noticed it was easier to just fill up the mason jars and then just put them away when I got home. I know it doesn’t “look” ideal, but to transfer the liquids into tall and skinny bottles like my Dr. Bronner’s Liquid Soap, is one extra step I prefer not to take.

DSC_4174

DSC_6237.JPG

I also love using Bormioli Rocco Fido Jars for containing my other bulk foods. I use the 1 Liter jars for bulk teas and a variety of snacks and the 1.5 Liter jars for larger supplies of bulk ingredients such as nuts, whole wheat flour, cane sugar, cranberries, mini peanut butter cups and other bulk snacks. I use the 2 Liter jars for dried beans, baking soda and coffee. For my largest bulk items such as brown rice and oatmeal, I use the 4 Liter jars. One of the websites I follow suggests to use these types of jars for wet ingredients, but I’ve noticed that the gasket that comes with these types of jars, absorbs odors and stains easily. If you prefer to stick to only one type of jar design, then I say go for it. However, odors are a nitpicky tick of mine. It just seems strange to me to open a jar almonds and smell lotion, or when you open the jar with cane sugar and you smell balsamic vinegar. By using the jars for dry ingredients, I can switch out my bulk supplies and not worry about leftover odor from a previous use.

When I first researched on different types of canning jars with hermetic seals, a few different brand names popped up such as Le Parfait, Kilner and Bormioli. The reason why I chose Bormioli was because of their design structure for their jars. Most of the jars I researched on are designed with a round base, which actually wastes space. Bormioli uses a square shape base which utilizes shelf space and will organize easily next to one another. Bormioli has a long history of creating quality glassware while using high quality materials. You can read more about their history here Bormioli Rocco USA.

DSC_4175DSC_4176DSC_4177DSC_4179

I also use PYREX tupperware to contain items I find at the grocery store salad bar, but I also use these to store my lunches to bring to work. I did bring the 1 cup, 2 cup and 4 cup bowls to the grocery store to carve their tare weight into the lids, because I knew I would use them eventually. It did feel a little strange at first, lugging around glass tupperware, but using the PYREX bowls was essentially the same as using one of the grocery store disposable paper containers. I knew that my extra effort would count in a small way- in the long run. At the salad bar, I’ll fill up my PYREX bowls with olives from the olive bar, hummus, potato salad and anything else I feel like indulging in.

I really like PYREX because it’s made of tempered glass and it’s easy to clean, store and you can use these to cook in toaster ovens as well as larger ovens.

DSC_4181

For my spices, it is a collection of many types of seasoning jars I’ve collected over time. I did buy a set of seasoning jars, and those are on the bottom row. I initially did this to test out how to go about recording the tare weight as well as how to fill them up. However, it did seem simpler to just reuse the rest of my seasoning jars. They do all have different tare weights and I carved each tare into each lid. I do suggest to use screw cap seasoning bottles as they are quite secure when closed correctly.

DSC_4178

I hope this post clears up how I go about organizing and designating my bulk items per container. I honestly wished I had read about some type of reasoning and method before I started my journey because a few mistakes were made along my journey. However, now that I have figured out my system, I wanted to share it with you. So happy bulk shopping and I hope trips to the bulk sections are more efficient for you.

Bulk Grocery Shopping Kit

03.21.2016

0900

DSC_3715

When it comes to grocery shopping, there needs to be an organized system of how you go about gathering your items. Pre-packaged food gave me this convenience when I hadn’t started on my journey to a zero waste lifestyle, so I had to break down what jars and bags I was going to use for bulk shopping.

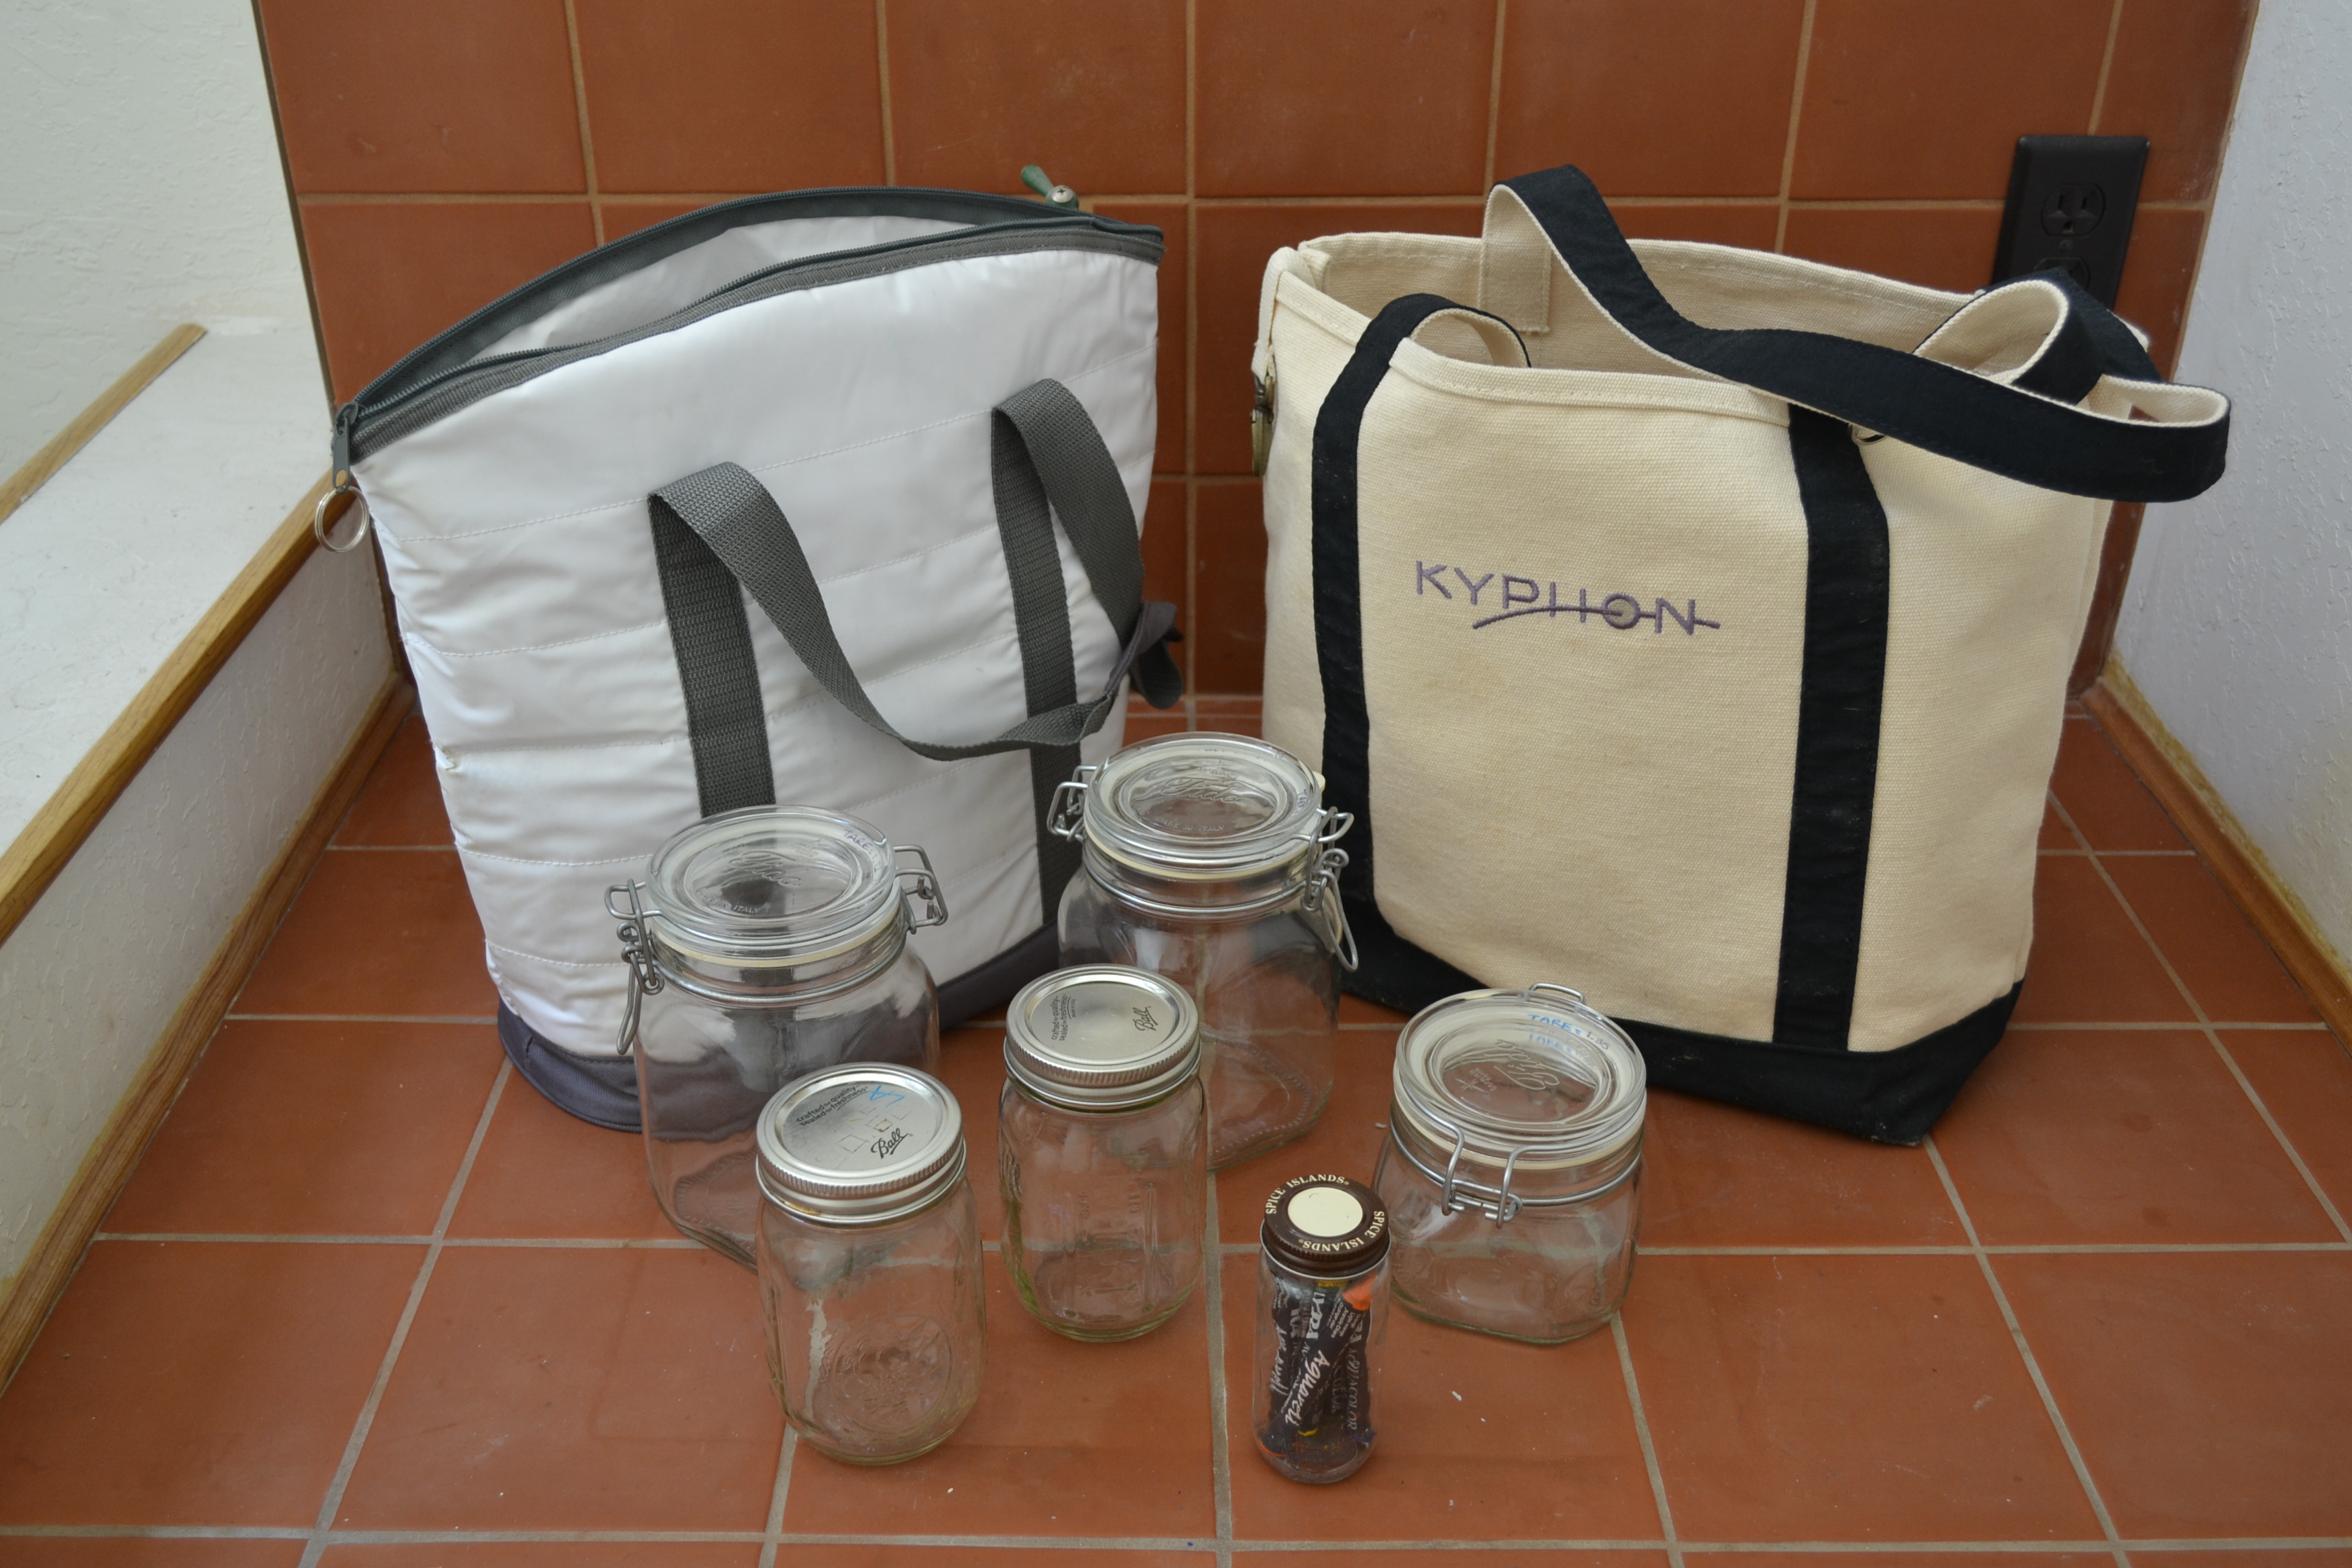
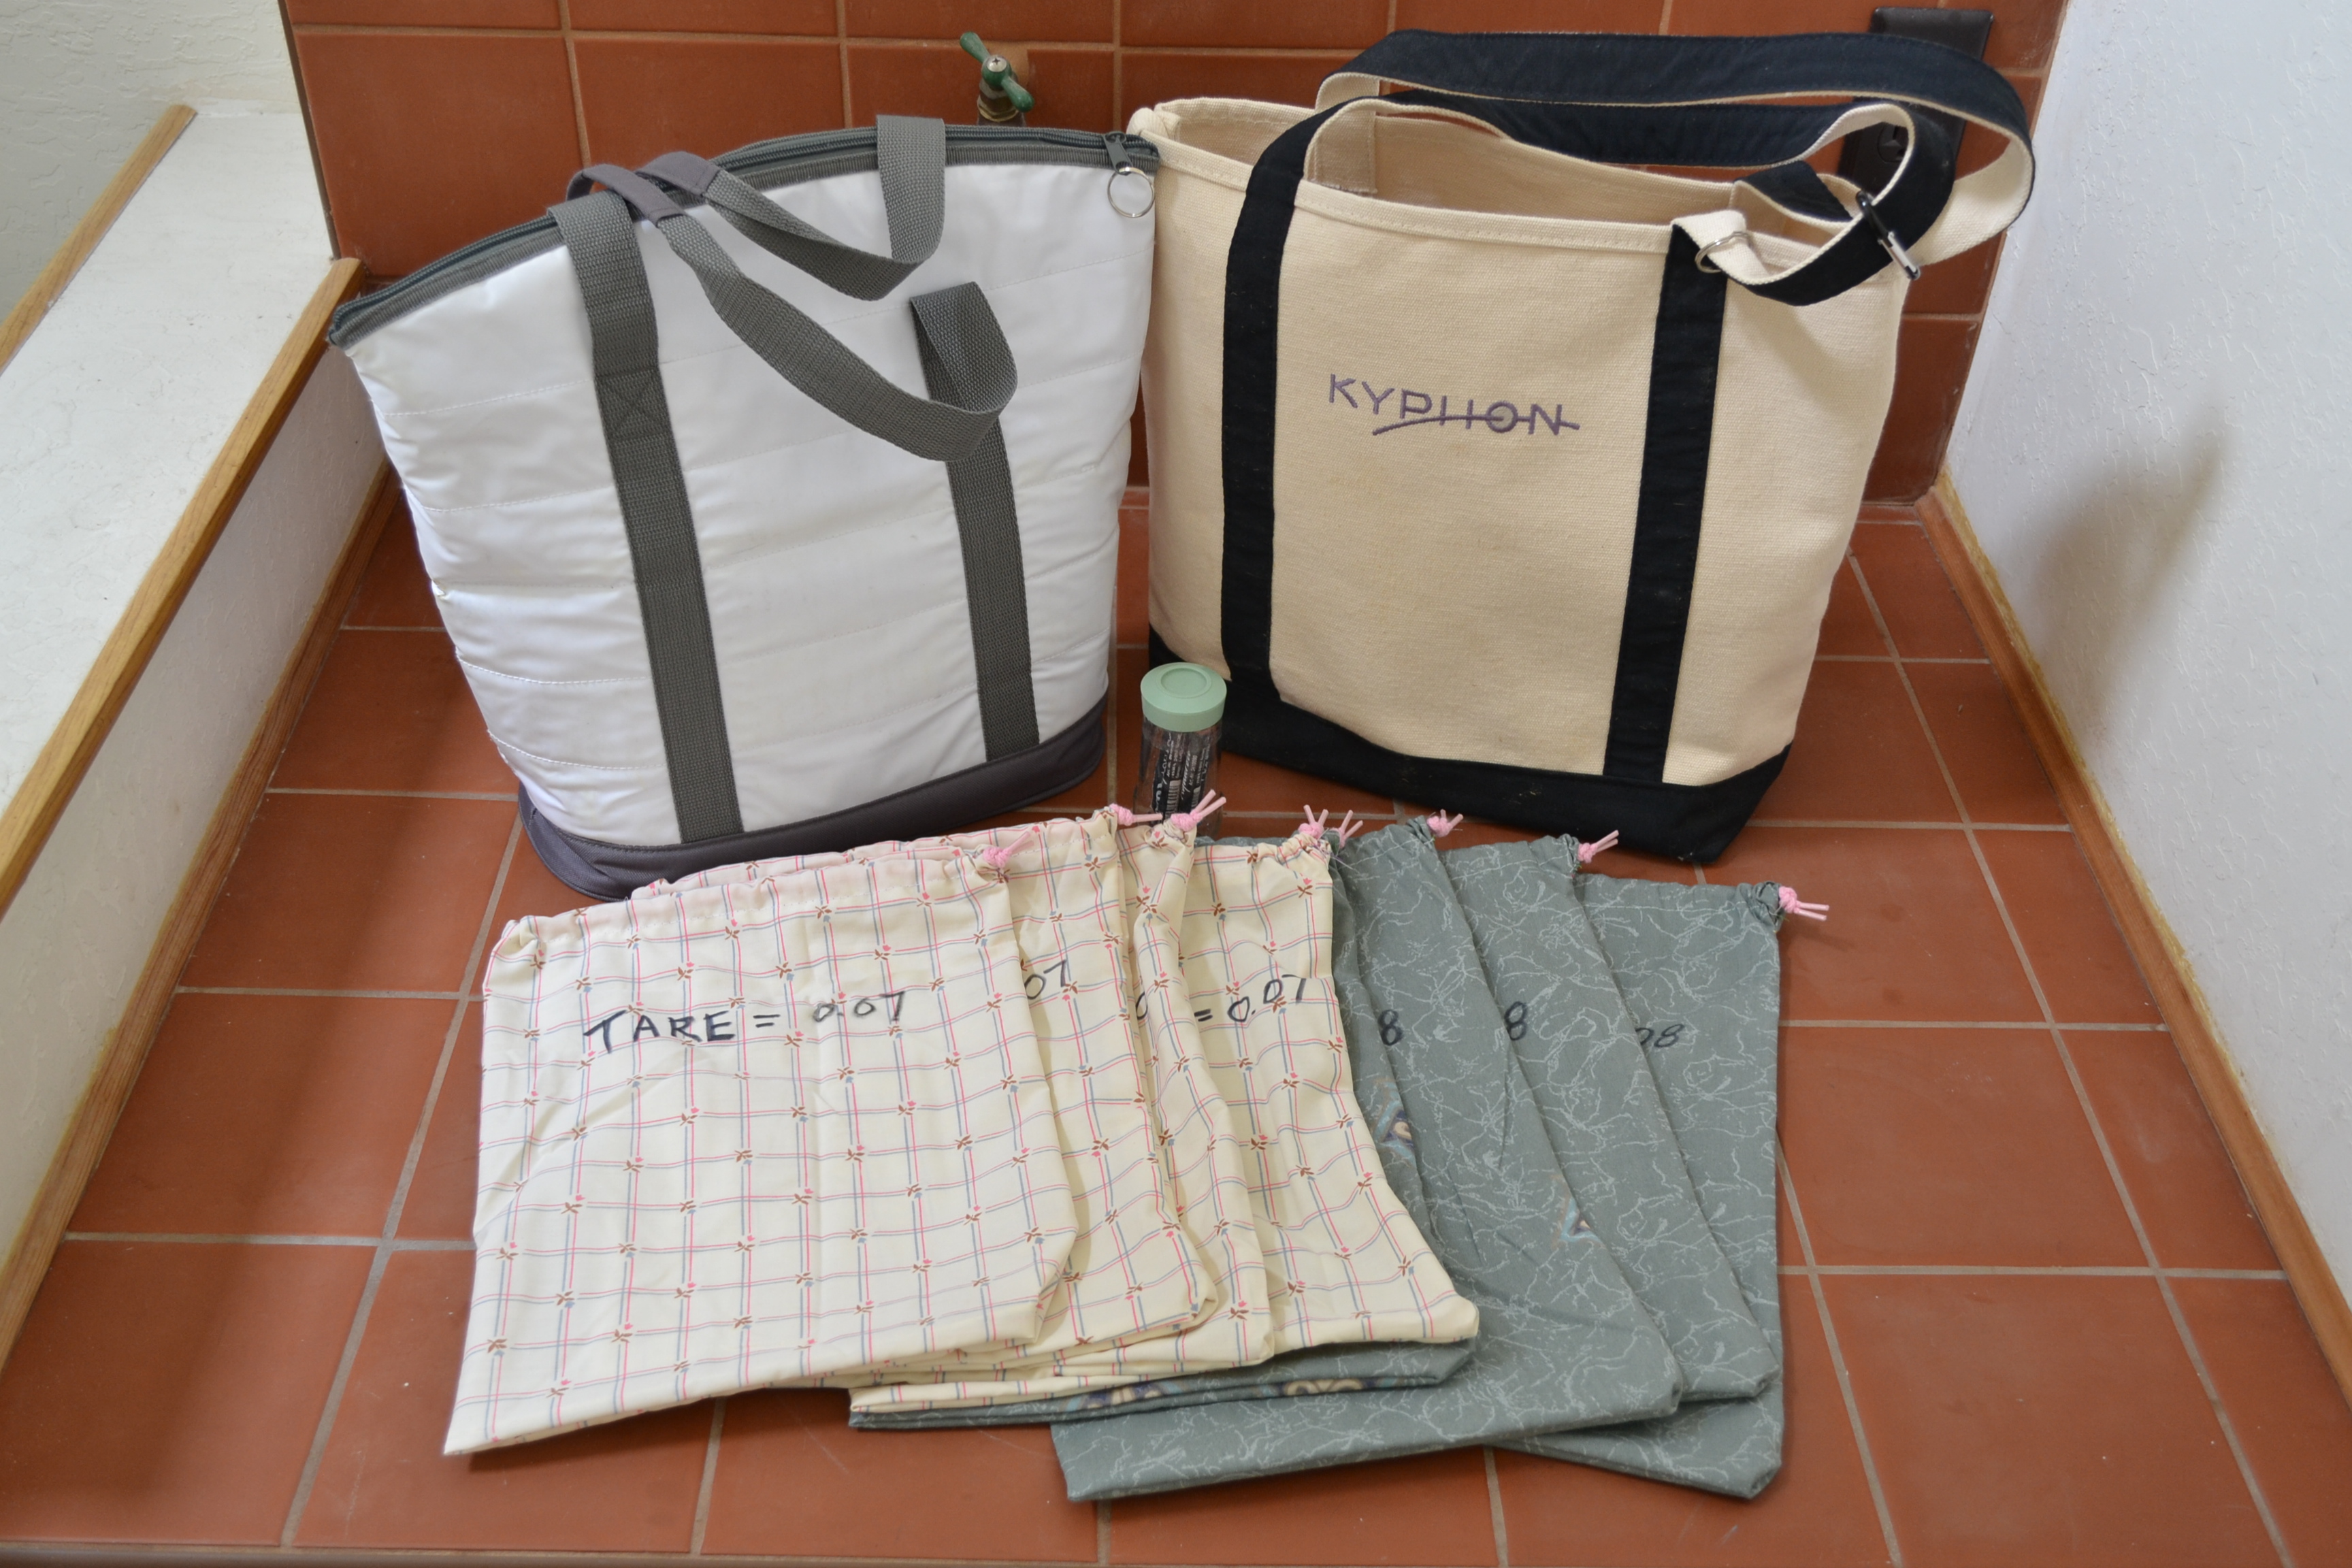
My bulk grocery shopping kit consists of cloth drawstring bags, Ball mason jars, Bormioli Rocco Fido Jars and my Lyra Aqua Color Water-Soluble Wax Crayons. I use the mason jars for liquid bulk food such as almond butter, honey, Bragg’s Liquid Amnios and balsamic vinegar. These jars are great for liquids due to the fact that there is very little left over odor from previous products when you need to use the jars for something else. I tried using the  Bormioli Rocco Fido Jars, but the gasket on those jars absorb odor quite a bit and they stain as well. For the fine grain bulk foods like wheat flour, cane sugar and sea salt, I use the Bormioli Rocco Fido Jars so that the transfer from my grocery bag to my shelf is much simpler. (I literally just move the jar from my grocery bag to my shelf- yea, unpacking after grocery store trips is that fast). The jars are also great for storing snacks from the trail mix bins section. If the jars are too heavy to bring to the grocery store, then the bags will still be fine to use. The drawstring bags are used for the rest of bulk grocery shopping as well as fruits and vegetables.

DSC_3717
DSC_3716

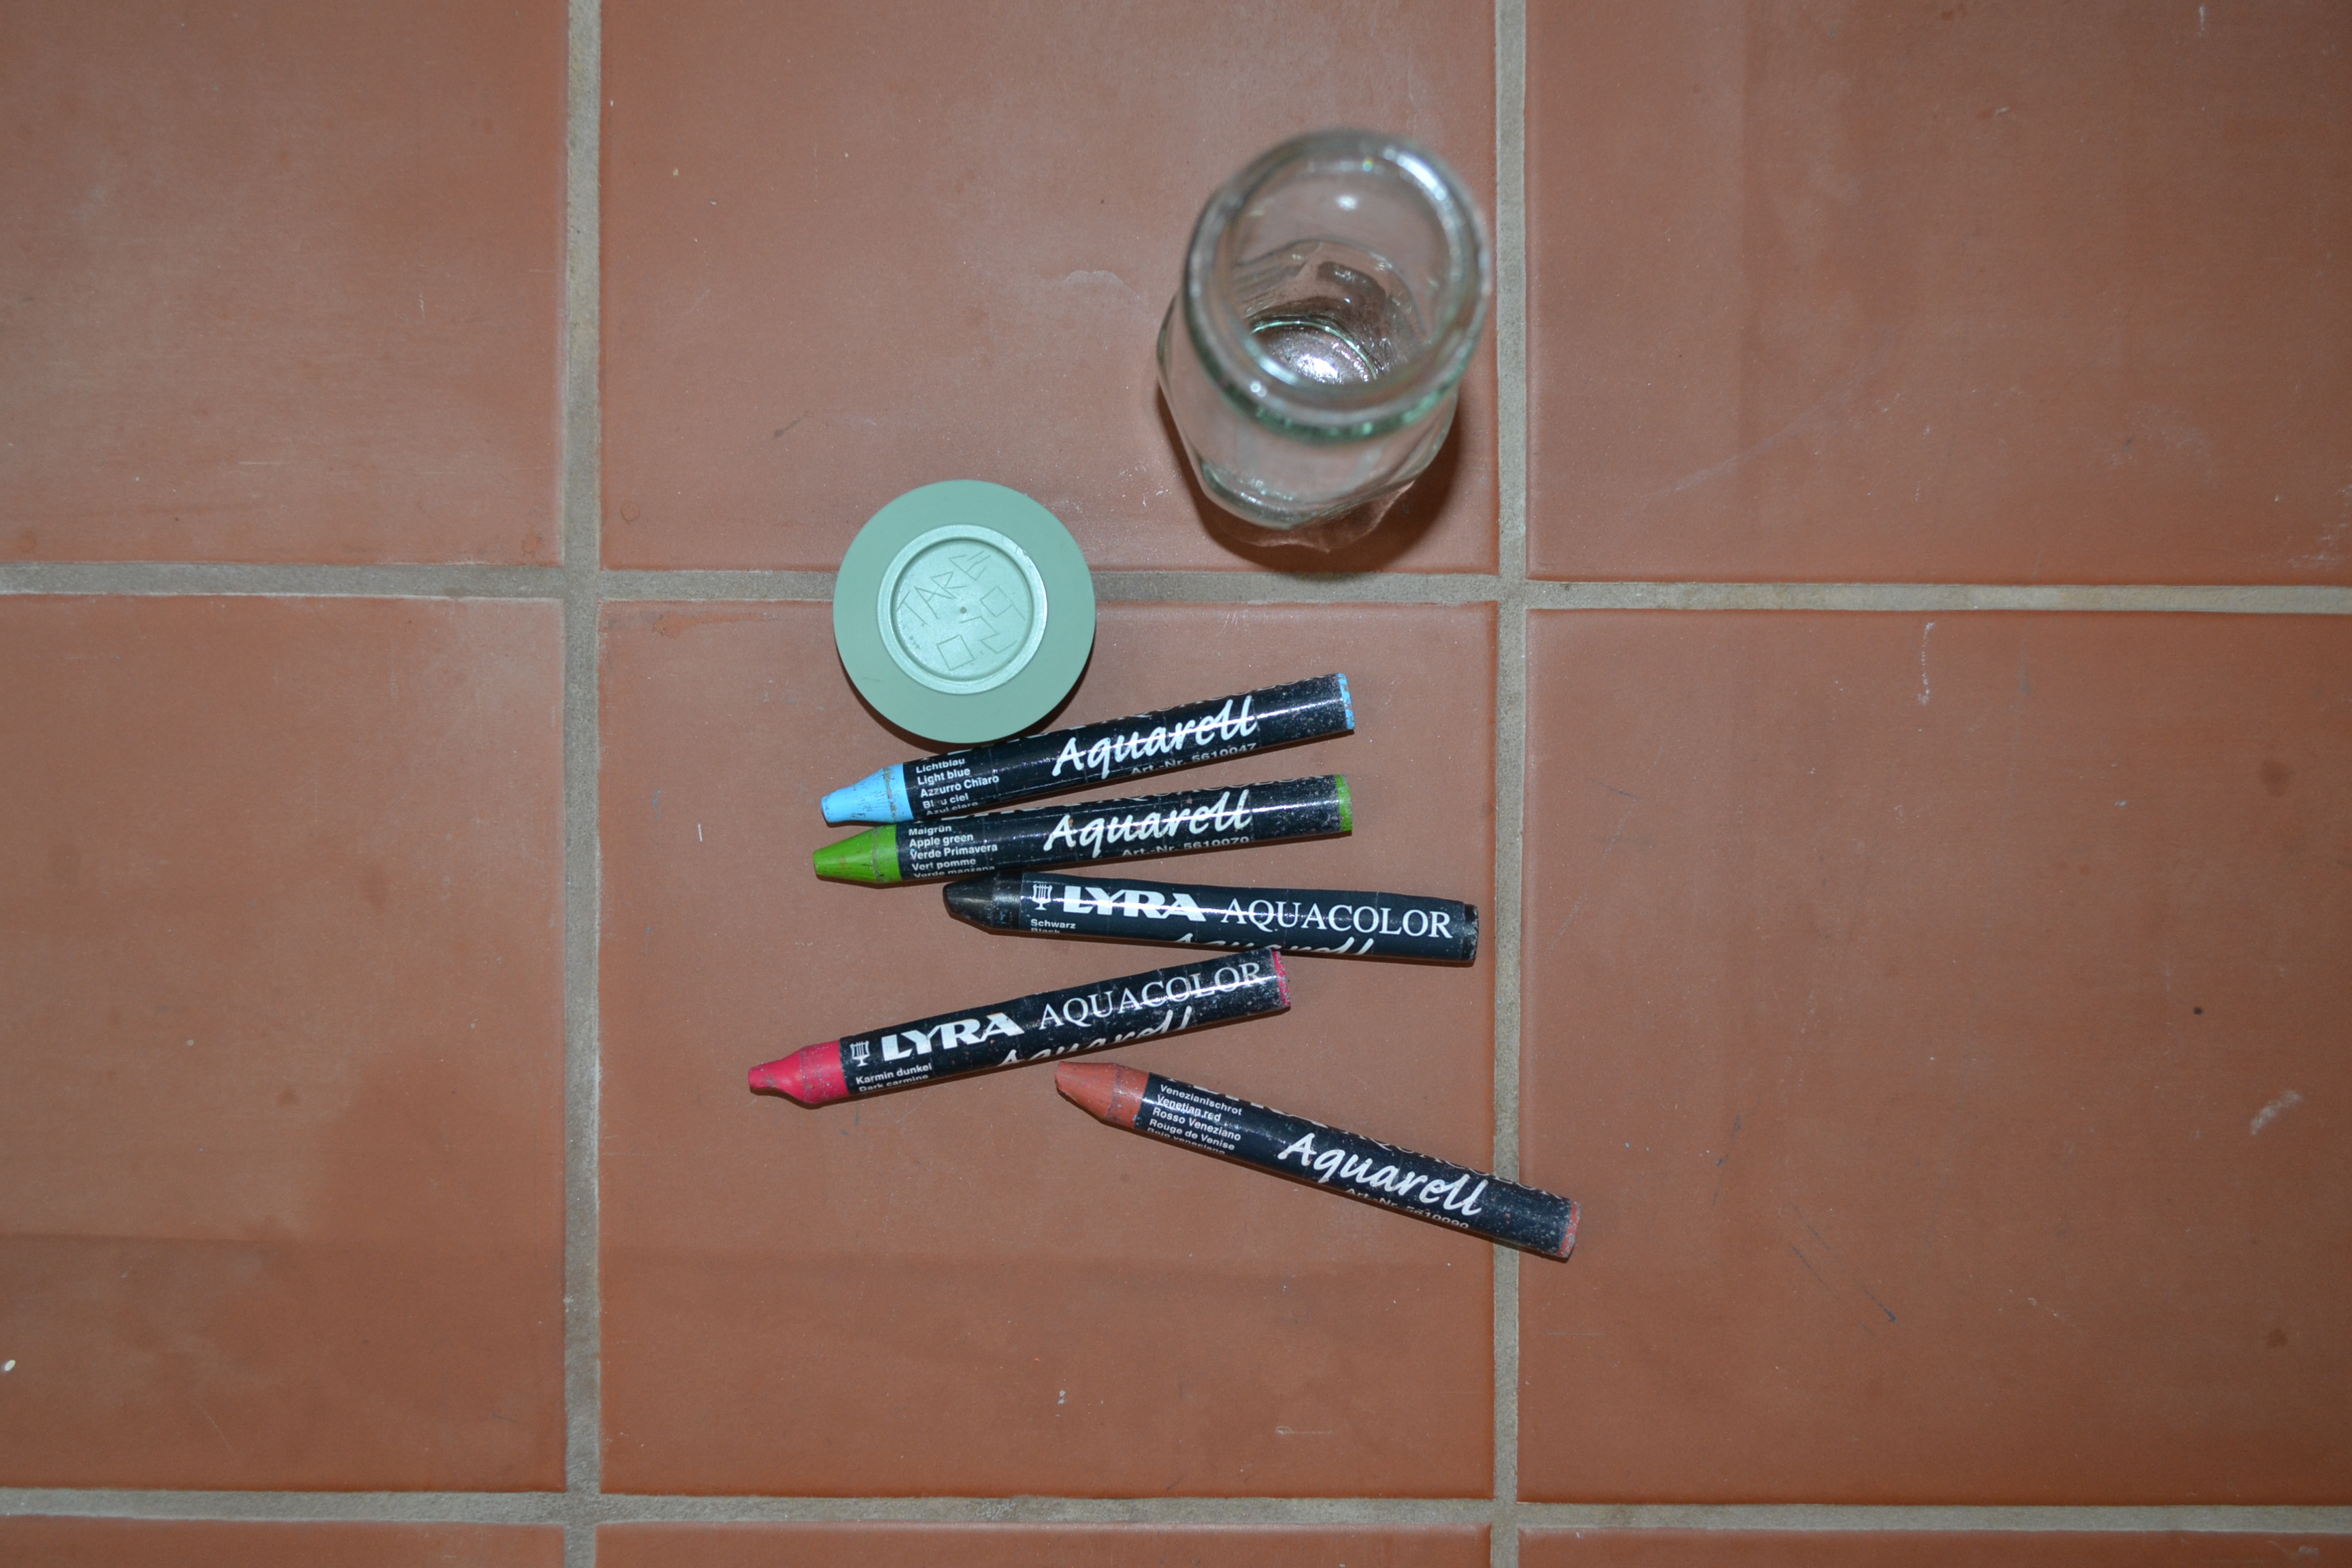
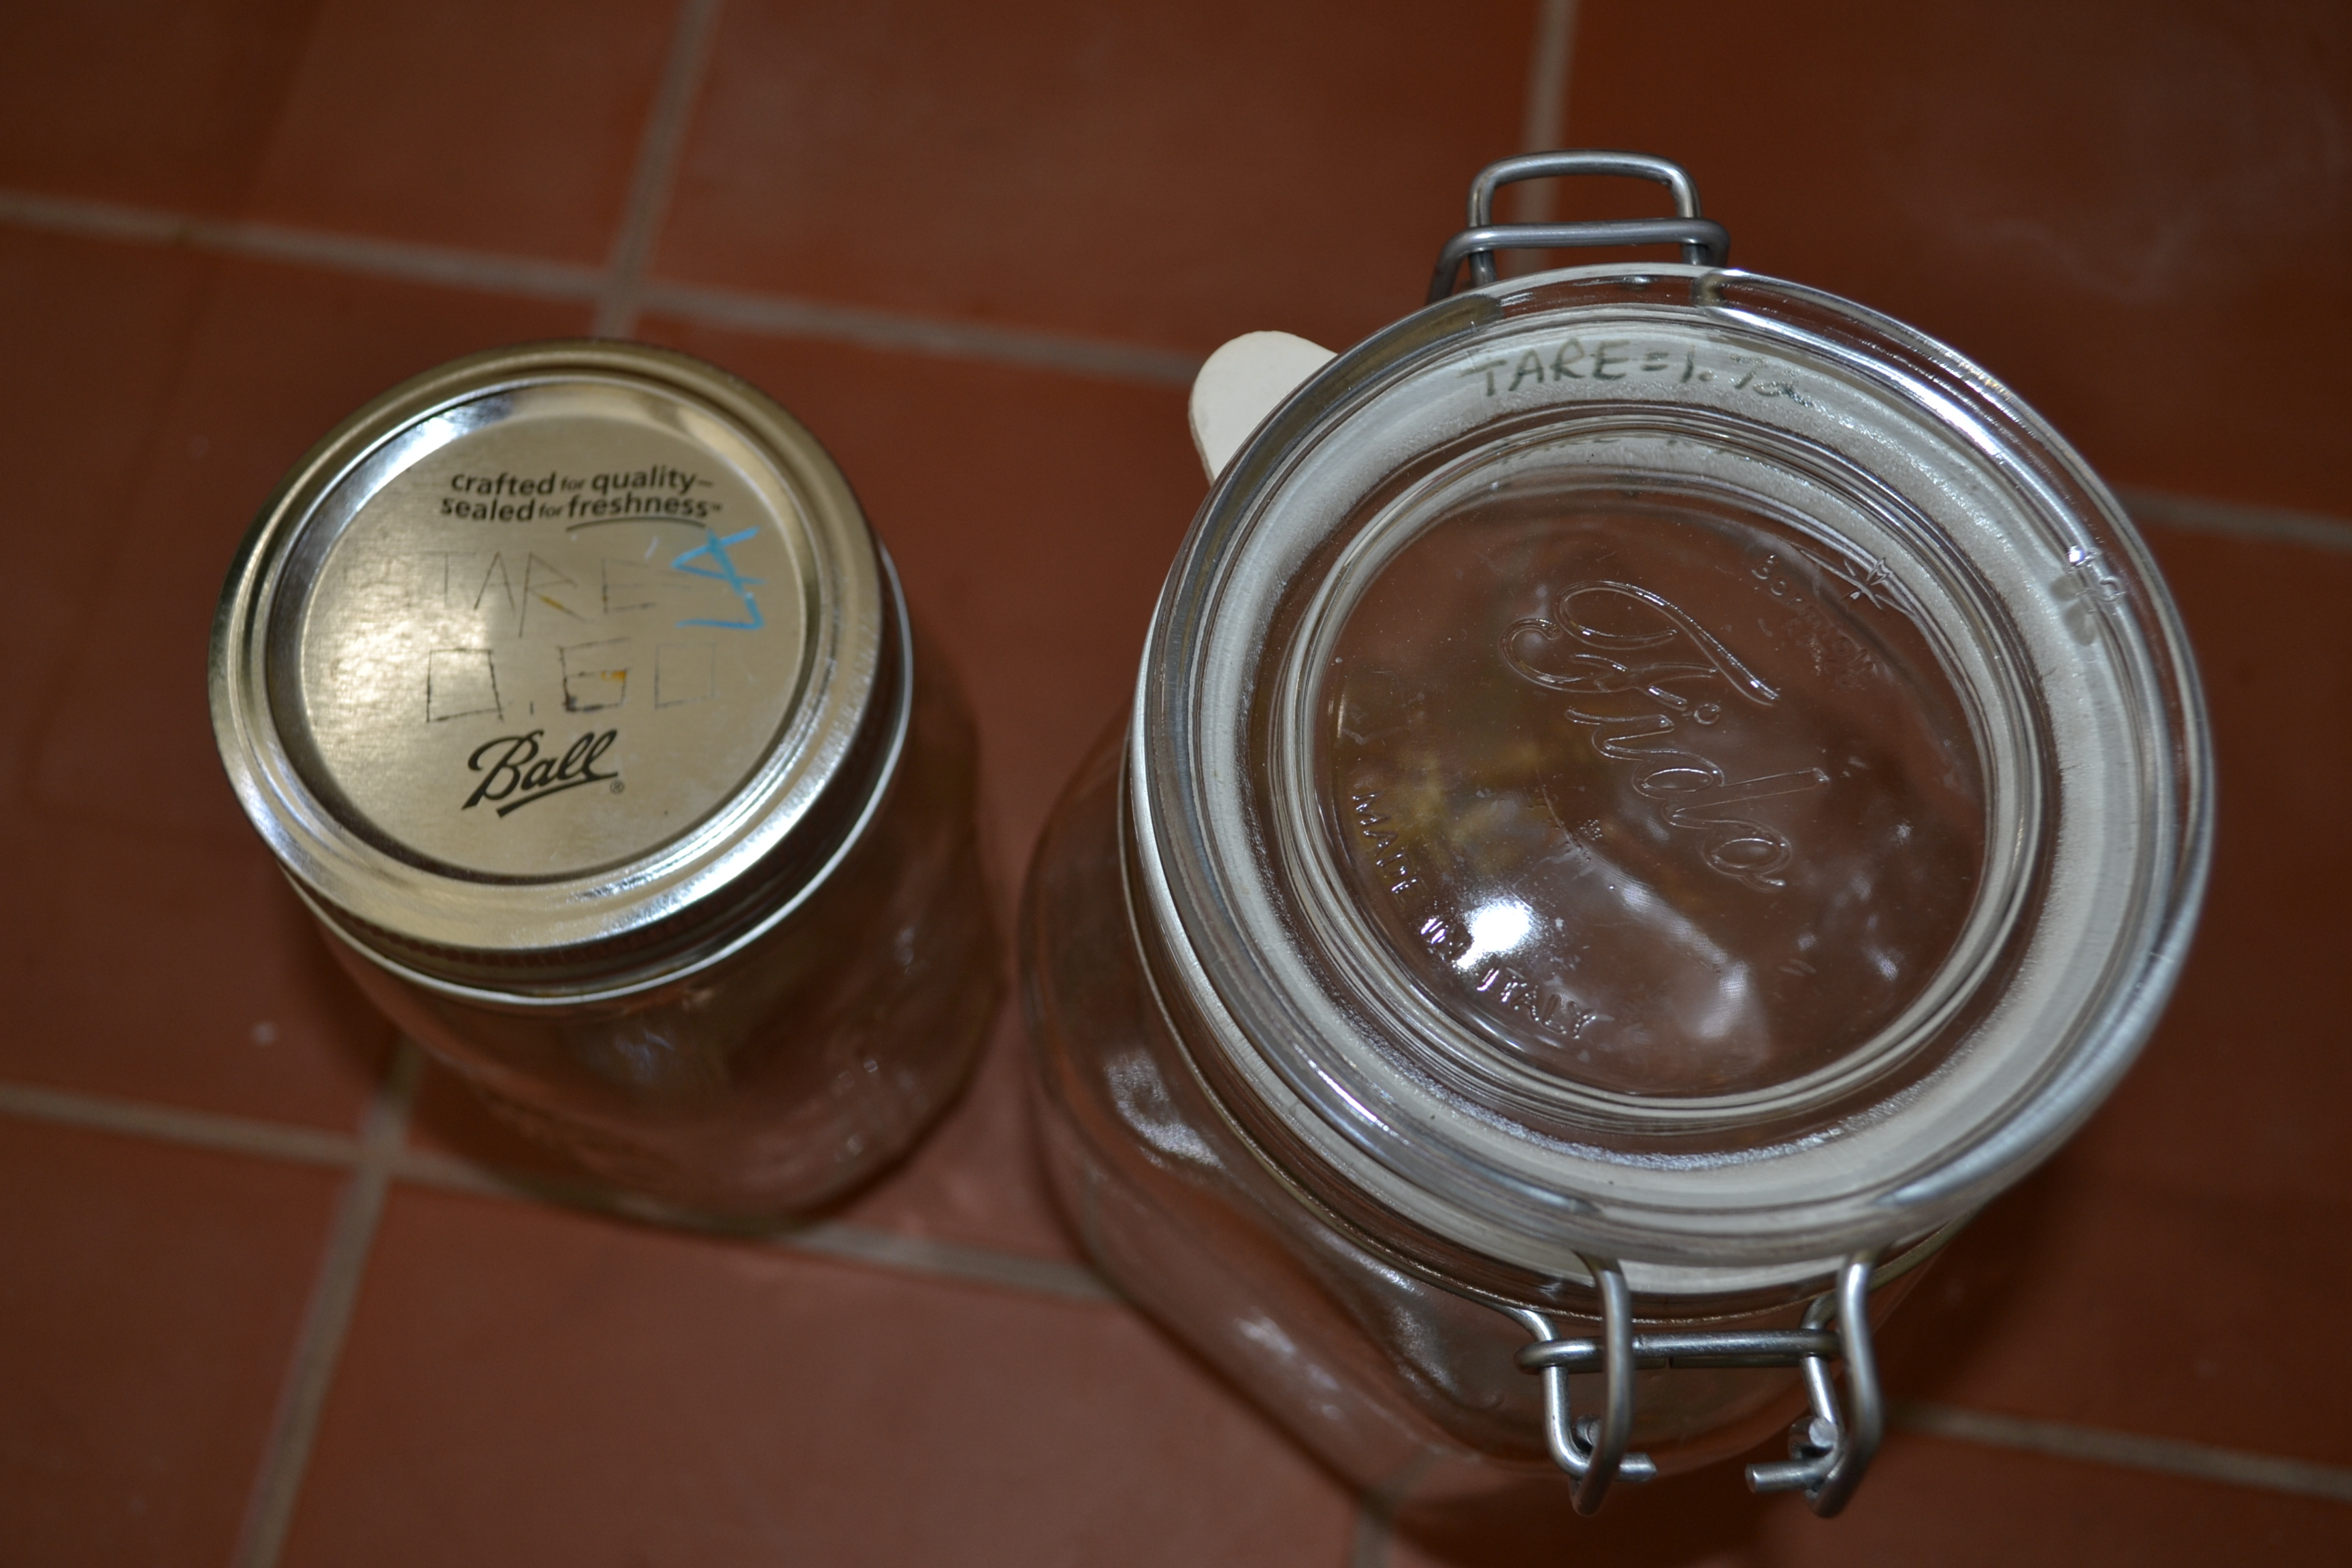
When you use the mason jars and the fido jars, make sure you tare the weight of the jars before filling them up. For the mason jars, I usually carve the tare weight into the lid of the jar and for the fido jars, I’ll write the tare weight on the inside of the gasket so that the cashier can see the weight through the lid. I write the PLU (price look up) code and the initials of the bulk food on the lid with the water soluble crayons. I write the initials alongside the PLU code because products with the same consistency and color can be mixed up (ie. balsamic vinegar and liquid amnios). I hope my bulk grocery shopping kit helps in prepping your grocery shopping kit. If you have any questions, I’m more than willing to answer them.

DSC_3984

A Zero Waste Lifestyle

01.17.2016

0646

Before I went zero waste, I used to buy anything bottled, use sponges in the sink, bought spices packaged in plastic bags and also in glass jars, and the worst culprit of all was that I bought packaged foods.

Kitchen Now:

  1. Whole Foods Market: Bulk balsamic vinegar, Bragg’s Liquid Amnios, raw honey, candy, oats, black beans, whole wheat flour, cane sugar, cranberries, spices and coffee.
  2. Philz Coffee: Loose leaf green tea and chamomile tea (and coffee if I want Philz coffee each morning)
  3. Kitchen Items: 3 pots & pans, 1 grill, 1 set of basic flatware, 1 set of basic kitchen utensils, 1 hand held mixer, 2 silicone bakeware pans, 1 dinnerware set, 1 set of mixing bowls, 1 set of Pyrex storage containers
  4.  Dining: Cloth napkins and kitchen towels, Tea infusers, re-useable wine corks, wind-up flash light and I now compost everything
  5. Recyclable products: Soups, baking soda, and occasionally wine

DSC_3441DSC_3444DSC_3446

dsc_3556

Living Room Now:

  1. Giant/small towels as floor mats and door mats, I hate that the rubber backing on standard door mats falls apart after exposure to weathering.
  2. I buy digital books or I check out books from the library (Fortunately I bought an iPad when I started grad school so it came in handy)
  3. I use an indoor air filtering plant to liven up the space as well as making it functional as well.
  4. I limit the amount of batteries I need/use. I replaced my flashlight with a wind up flashlight and in total I have 3 items that uses batteries. In addition to that, I limit the size of batteries to AAA or AA (it’s really not necessary to have a library of them and it makes attaining them harder when traveling).
  5. Christmas bag: Flour sack towels (28″x 29″) and bandannas for wrapping gifts. If you wrap gifts using basic box wrapping techniques and then tuck the ends within the folds, you can always secure the wrapping. Or check out Furoshiki and check out the techniques they list and their products they have available.
    1. Here are some examples from the website:

Basic WrapFlat Object WrapRoll Wrap 1

Office Now:

  1. I use refillable ball point pens and lead and replace them in my pen/pencil unit
  2. Due to my profession, moving away from rendering materials is quite difficult so I do use colored pencils and a lead holder as well as a Faber-Castell kneaded eraser. (The kneaded eraser doesn’t slough off eraser bits)
  3. I used to keep my work saved on re-writable CDs but now I have a 1 TB external hard drive. I also utilize my emails and use my clouds to store data.
  4. I use a stapleless stapler so now I don’t buy staples for refilling and it’s very efficient
  5. I’ve opted out of junk mail as much as I can but some mail still gets through, when it does, I use the back of the one sided pages as scratch paper (I can’t remember when the last time I bought paper).
  6. Recyclable products: Envelopes, stamps and Christmas cards… There are still items I value and I can’t seem to stray from and hand writing is one of them. I value a hand written letter, the ink/lead on paper denotes a moment in time- a moment in time when the writer touched the document as well as the receiver.

This is an over all view of what my life inventory looks like now. It makes life a lot easier when I have less to worry about. Majority of my time, I think I’d prefer eating food or going on an adventure. Once I got rid of a lot of my items, I noticed that I sleep better now, my stress level seems to lessen because there’s less upkeep with my life. It’s strange how when I used to think of hanging out with my friends meant that we would go shopping (and not window shopping), and now that shopping really isn’t a part of my life- I had to search to find what to replace it with. Even if I had the choice to document my life in photographs, I think there’s still a pressure to do so- sometimes, the memories are enough to take away from that experience.