DIY Reusable Face Masks

04.27.20

0600

Materials:

  • Paper- Graph paper might be easier to follow the grid system
  • Pencil- If you plan on sketching out the templates
  • Fabric Crayon- If you plan to sketch the templates on dark fabric
  • Ink pen- For tracing the templates onto the fabric pieces
  • Ruler (Centimetres)
  • Fabric
  • Elastic bands/ribbon/surge fabric together to create straps to tie around head

Tools:

  • Sewing Machine
  • Sewing Kit

So I’ve been seeing a lot of YouTube videos, blog posts and Instagram posts of DIY reusable face masks recently. I wanted to try to figure out how to design a face mask that anyone could make and use.

However, I didn’t want my readers to have to print out a template if you were not able to. I wanted to teach my readers how to be able to build your own template. Not everyone has access to a printer, printer paper or even printer ink right now, so that was my overall goal for this blog post.

So I decided to design my own templates, but I wanted to give you guys the measurements as well as the templates. The following 6 images are of the designs I created (they are in JPEG format). You can download them or use the measurements and create them yourselves. These were all drawn on 8.5″ x 11″ sheets, or 21.59cm x 27.94cm sheets. The light, dashed lines, around the bold black boarder on each image, is the edge of the paper. I decided to create these drawings in centimetres since the metric system is more universal. The fabric filter insert templates are not a guarantee of protection from any virus, but it will give you an extra layer of fabric, along with the mask.

I had drawn out the first templates, so what you’re looking at (below) was my own first round of the templates. I cleaned up the design for the downloadable images for you guys.

First decide which fabric will be the exterior layer of your mask, then decide which fabric will be your interior layer of your mask. After that, you can choose a fabric to be your filter layer. I tend to chose a lighter color for my filter layer, so it stands out from the rest of the mask. For my fabric filter inserts, I used whatever leftover fabric I had.

I decided to show you how I created the child sized reusable face masks and reusable filter inserts in this blog post. The same steps are used to make the adult fabric masks and adult filter inserts.

REUSABLE FABRIC FACE MASKS:

First I cut out fabric pieces for each of my masks. There are two fabric pieces for each of those six cutouts in the next photo. I chose my exterior layer fabric and interior layer fabric and I then traced the child mask template onto each set of fabric piles. I didn’t trace the templates onto each fabric piece, since I like to cut my fabric, two at a time.

I cut up the fabric I chose for my filter layer for each mask, and then I traced the child filter templates onto the fabric pieces.

Once I traced all of my templates onto the correct fabric piles, I pinned the fabric piles together and cut out each set accordingly.

For each pile of the filter layers, I placed each set with the ugly side facing up, so I could hem the edges. I simply folded over the edges, pinned them in place and then sewed them together. I used a back stitch so I could secure the ends of the sew lines. I used a zigzag stitch throughout this whole project.

So each set of fabrics for each mask will include, two exterior pieces, two interior pieces, two filter layer pieces. I had already cut out my ear straps, which were 12cm each. But I wil elaborate on the ear straps later on.

Now you have to sew each set of fabric layers together. For each set of fabrics (ugly side facing outwards), sew along the arch edge, from one end to the other.

Now we have to line up each fabric pieces to get ready to be assembled. First, interior layer (ugly side down), then on top of that is the filter layer (ugly side down), and lastly, the exterior layer (ugly side up). Pin together the stack so they wont move during the sewing process, and sew along the top and bottom of the mask. Trim the excess thread on the ends of each sew line.

Flip the face mask inside out, between the filter layer and the exterior layer.

Once you flip the mask inside out, you should be looking at the pretty side of the exterior fabric on one side of the mask, and then the pretty side of the filter layer fabric on the other side of the mask.

I folded in the sides of the mask so I could pin the fabric together. You can also iron the folded sides too, so there is a clean and crisp edge. I just needed the edges to build their shape until I added on the ear straps.

I actually cut out straps, about 12cm in length. In order to test the fitting of the straps, I actually pined the straps in between the exterior layer and the interior layer, on the side. The pins are pushing from the interior layer, outwards. If you want to use this method to test the fitting of the ear straps, please be very careful when trying on the mask.

If you don’t have elastic bands, you can quickly sew long pieces of fabric together and use the long pieces as ties, to tie around the user’s head. I used four pieces of fabric that were 72cm in length and made my straps 4cm wide, for one mask. Technically, you probably only need each strap to be 25cm in length, as long as it can be tied around a large adult head with enough extra slack for an extra knot. Each strap will be sewn to each corner of the mask.

I cut out each strap, folded them into thirds and then used only two pins to secure one beginning end of the strap together. I didn’t pin down the whole strap, because with a fabric this small, it’s quicker to sew and fold simultaneously, as the fabric is passing underneath the presser foot of the machine. The machine will feed the fabric under the pressure foot, so just hold the folded fabric steady and taut.

I also created a back stitch at the beginning and end of the strap to secure the sew line.

Once you decide if you want to use elastic bands or sew your custom straps together, you can tuck the ends of the straps between the exterior layer and interior layer, and sew the edge of the mask together.

Using my ink pen, I drew tiny triangles on the top straps of each mask to indicate the top verses the bottom of the masks.

EDITERS NOTE:

I decided to change the style of straps for my masks, since I was not 100% satisfied with the design. I decided to shorten the seam on the top and the bottom of the mask so there would be a small 1/4″ gap at the top and a small 1/4″ gap at the bottom of the mask. I did use the backstitch control on my sewing machine so the thread would be held in place. As you can see, I used the backstitch at the beginning and the end of the sewing line.

I then attached an elastic band to a small safety pin and inserted the safety pin into one of the small gaps, so I could run it through the mask, and out the other end. It doesn’t matter which direction you run the safety pin, but I tend to start with the small of the two gaps, so it’s easier to locate the pin when I need to pull it out the other end.

I then tied off the elastic band with a single knot. I like this style more than the last style, because this technique allows the elastic band to be replaced easily and adjusted easily.

REUSABLE FABRIC FILTER INSERTS:

Using my templates, I cut out fabric pieces for both my adult template as well as my child template. For each template, there are two fabric pieces per set. I then pinned them together, so they wouldn’t move when I had to sew them together.

With the ugly side of the fabric facing outwards, I cut out filter insert pieces and then sewed them together. I sewed in one direction, around the edge of the mask, but left one side open. This opened side will be the location of where the filter insert needs to be flipped from the inside to the outside. I used the back stitch lever to secure the sew line, as always. I then trimmed the extra thread.

I flipped the filter insert, inside to outside and using a chopstick (you can use a slim stick), I made sure all of the corners and edges were fully stretched out from the inside.

I then ironed all of the fabric inserts I had sewn and then tucked in the open end to pin the fabric closed. I then hand sewed that edge of the filter, using a running stitch.

So there you have it. My templates are available for anyone to download and you can make as many as you like. Please keep in mind that these masks are not a guarantee against any type of virus, but they will help protect you from other people’s exposure to you. There are a lot of fabric mask tutorials on social media right now, and I hope you can find one that you prefer to use and make. I hope this blog post helps anyone it can reach.

PLEASE STAY SAFE AND HEALTHY EVERYONE AND I HOPE TO SEE YOU GUYS SOON!

☁️

Sofa Armrest Organizer

10.14.19

0600

Materials:

  • Two Curtains at 5′-10″ in length

Tools:

  • Sewing Machine
  • Sewing Kit

I have an extra set of curtains, which I didn’t want to use anymore. I decided to create a sofa armrest organizer with both curtain pieces. Both curtain pieces were 5 foot 10 in length, and 27 inches wide.

I wanted my sofa armrest organizer to sit at a certain height off the ground, but I also wanted the top half to also tuck underneath the couch cushion. I first measured how high off the ground I wanted my couch armrest organizer. Since I needed to hang it over the sofa armrest and then wrap back over the arm to tuck underneath the cushion, that left about 47 inches to tuck underneath the cushion.

I wanted to store books in the first organizer, which would be fairly heavy, so I needed a lot of the material to tuck under the seat cushion to hold it in place. I actually wanted the top part of the organizer to tuck underneath an entire sofa cushion width, due to the weight that would be applied.

FIRST SOFA ARMREST ORGANIZER:

When I measured out my first design, I wanted the pockets for my books to be 14 inches in height. I first hemmed all of the edges and then I folded one edge to create the 14″ tall pockets. I sewed around the edge of the folded piece (yellow arrows) and then divided the pocket in half, and sewed a dividing line down the center to create two tall pockets (red arrow). These pockets will be able to hold my books and paperwork that I’m currently working on. I wanted my pockets to be a bit taller than the standard paper size (8.5″ x 11″), due to the fact that I knew the width of the pocket might eat up some of the height. I also wanted to be able to hide my books and paperwork, so my pockets wouldn’t look like they were overflowing with paper.

To attach the sofa armrest organizer, I removed the couch cushion on the side of the couch, located how high I wanted to hang the organizer, and then replaced the couch cushion. Since the top half of the fabric organizer is tucked under the couch cushion, it stayed in place.

SECOND SOFA ARMREST ORGANIZER:

I also wanted to create a second design, which would have smaller pockets for smaller items. My second design would have 10 inches in height for the books, and 6 inches for smaller objects.

Using the same sewing method as the first design, I hemmed all of the edges of the fabric material, and then measured 16″ of material at one end. I folded up the 16″ material, sewed along the outside edges of the tall pocket (yellow arrows), which created a giant 16″ tall pocket.

I then took the bottom 6″ of the pocket and folded it up, to create a shorter 6″ pocket at the bottom. This 6″ tall pocket also helped create the 10″ pocket behind the smaller pockets. I then sewed on both of the side edges of the fabric piece (red arrows) and then sewed a dividing line (blue arrow) to create a total of four pockets for this design. I sewed the edges of this design, all the way to the top of the pocket to reinforce the side edges.

Using the same method as the first sofa armrest organizer, I located where I wanted the organizer to hang on my armrest and I tucked the top half of it under the couch cushion on the end.

Since these sofa armchair organizers are made of fabric material, I can toss them into the washing machine and wash them easily. I can also fold them up and put them away if I don’t need to use them. Fabric is my favorite material to work with since it can be taken apart and reused multiple times. I love that it is a very flexible medium and I was able to put my old curtains to good use.

Cleaning My House

07.15.2019

0600

I don’t like using a lot of harsh chemicals to clean my house, because of the dangers that chemicals can cause to our physical well being . So I tend to use a combination of natural products. For scrubbing, I like to use a combination of Dr. Bronner’s liquid peppermint soap, as well as baking soda as an abrasive. I like to use a simple brush to scrub services, because those are easy to rinse off.

I’ll use a combination of water and apple cider vinegar to wipe down surfaces as well. I will use old cotton wash clothes and cotton rags to wipe down surfaces.

For cleaning my toilet, I will usually use apple cider vinegar, and a simple toilet brush to scrub the surface. If I need to use an abrasive to scrub my toilet, I’ll use baking soda to do so. I do get nervous about harsh chemicals be in the home because I don’t like the idea of inhaling toxic fumes. I think that now that we know more about toxic chemicals and how harmful they can be, we have the power to make better choices about what we use in our homes.

When it comes to cleaning the hardwood floors, I have a dust mop and also a floor broom and dust pan set. I do have a vacuum that I use, but it’s only once a while that’ll pull that out.

If I need to clean the surface of the floors, I’ll first use a combination of Dr. Bronner’s liquid peppermint soap and water to dilute the concentration of the soap formula. I’ll first wipe down the floors with the soapy liquid, than, I’ll go over the cleaned floors with a clean wet rag, to pick up the soap residue. I just wipe down the surface with rags. I do it by hand because the floor seems to be cleaner with this method.

For the rest of the surfaces, dust is really the only issue when it comes to cleaning my other furniture services. I can wipe down the surfaces easily with a simple rag.

I have a fairly simple cleaning routine, and it really doesn’t take much time to get through it on a weekly basis. It also helps to not own many items and keeping my surfaces clean, also speeds up the process. But I’ve been fairly happy with my cleaning routine, and by using non toxic chemicals, I can sleep better knowing that I’m not creating a toxic indoor air environment for my family.

How I Remove Labels On Glass Jars

04.23.2019

0600

Tools:

  1. Stove/microwave to heat up water
  2. Extra old toothbrush
  3. Extra cup wider than your jar/ stove top pot

Materials:

  1. One jar with label glue still stuck to it
  2. Dr. Bronner’s liquid soap
  3. Baking Soda
  4. Water

So I’ve read online about a few tricks of how people remove sticky labels off of glass jars. I’ve read about the method of using olive oil along with baking soda, and then there’s the method of heating up the glass and peeling off the label. I don’t like to use excess oil to clean, because when you wash off the jar, the oil can clog up your plumbing pipes, over time. I have tried to heat up my glass to peel off the label, but it doesn’t always peel off completely. There is one method I’ve stuck to for awhile, but I don’t see people posting about it. My method is pretty simple and it seems to work for me.

I will first peel off the label so that the only film left is the paper and glue. Some jars use a plastic/nylon label and some use paper labels. I like to get rid of the excess label before I start to remove the glue and label. By removing the extra thick layer of label, the jar cleaning process goes by quicker, without any hangups during the process.

After that, I find an extra cup that my jar will fit into. If you can’t find a jar, at least find a pot wide enough, where the jar can be placed horizontally, inside the pot and completely submerged under the water.

I then heat up water in my stove top kettle. I heat it up where the water is pretty hot to the touch, but not scalding hot. The water doesn’t need to be scalding hot to be honest. The idea here is that the water, mixed with the soap, will loosen up the glue.

I’ll then pour the heated water into the larger cup, in between the larger cup and the jar, and a little bit inside the jar. The heated water around the jar is to help loosen the glue off of the jar and the water inside the jar is to weigh it down. I pour enough water into the cup, so that the label and glue are submerged under the surface of the water.

I’ll then drop a few drops of Dr. Bronner’s Liquid Peppermint soap into the water around the jar. I’ll usually spin the jar in the cup a few times, so the liquid soap is distributed more evenly. The soap, mixed with the hot water will loosen up the glue.

After about 30 minutes, I’ll take the jar out of the soapy water. Please be careful, because your jar might still be very hot from being submerged in the water. If it is still too hot to handle, let it sit for a bit longer so the temperature of the water cools off . DO NOT run the hot glass jar under cold water to cool it down. This will likely lead to your glass jar cracking or exploding under the drastic temperature change.

NOTE: Glass expands when hot, contracts when cold. If the exterior surface of your glass jar cools, while the inside surface of your jar is still hot, that creates an uneven thermal profile.  As a result, the surface of your jar is trying to shrink, but the hot inner glass prevents the surface glass from shrinking. This creates a powerful stress profile through the glass — the surface is trying to shrink, but can’t, so it is forced into tension. The hot core is trying to stay the same volume, but the surface is squeezing in, so the core undergoes compression. It’s not hard to figure out which section of glass wins the tug-of-war — the surface fails first. And a crack grows out of some microscopic scratch or flaw, growing and spreading until the stress is sufficiently relieved or the glass is broken clean through. 

SO PLEASE DO NOT RUN COLD/COOL WATER OVER YOUR HOT JAR.

Once it is a bit cooler to the touch, I’ll use baking soda to scrub off the glue, using an old toothbrush. I’ll scrub in circular motion, and periodically dip the jar in the soapy water to rise it off as I scrub my way around the jar.

This method has worked for me, when I’ve needed to remove sticky labels off of glass jars.

Also remember, glue is not permanent on glass. So if you’re patient and allow the glue loosen up, and continue to scrub using the baking soda, than you’ll end up with a clean surface. Sometimes there might be a little bit of glue left, but just continue to scrub it off with the baking soda and soapy water.

This was a simple post, but it was a method that I realized I had never talked about, but always used. It’s just glue; it’s not permanent and it’ll come off.

Bulk Grocery Shopping Kit

03.21.2016

0900

DSC_3715

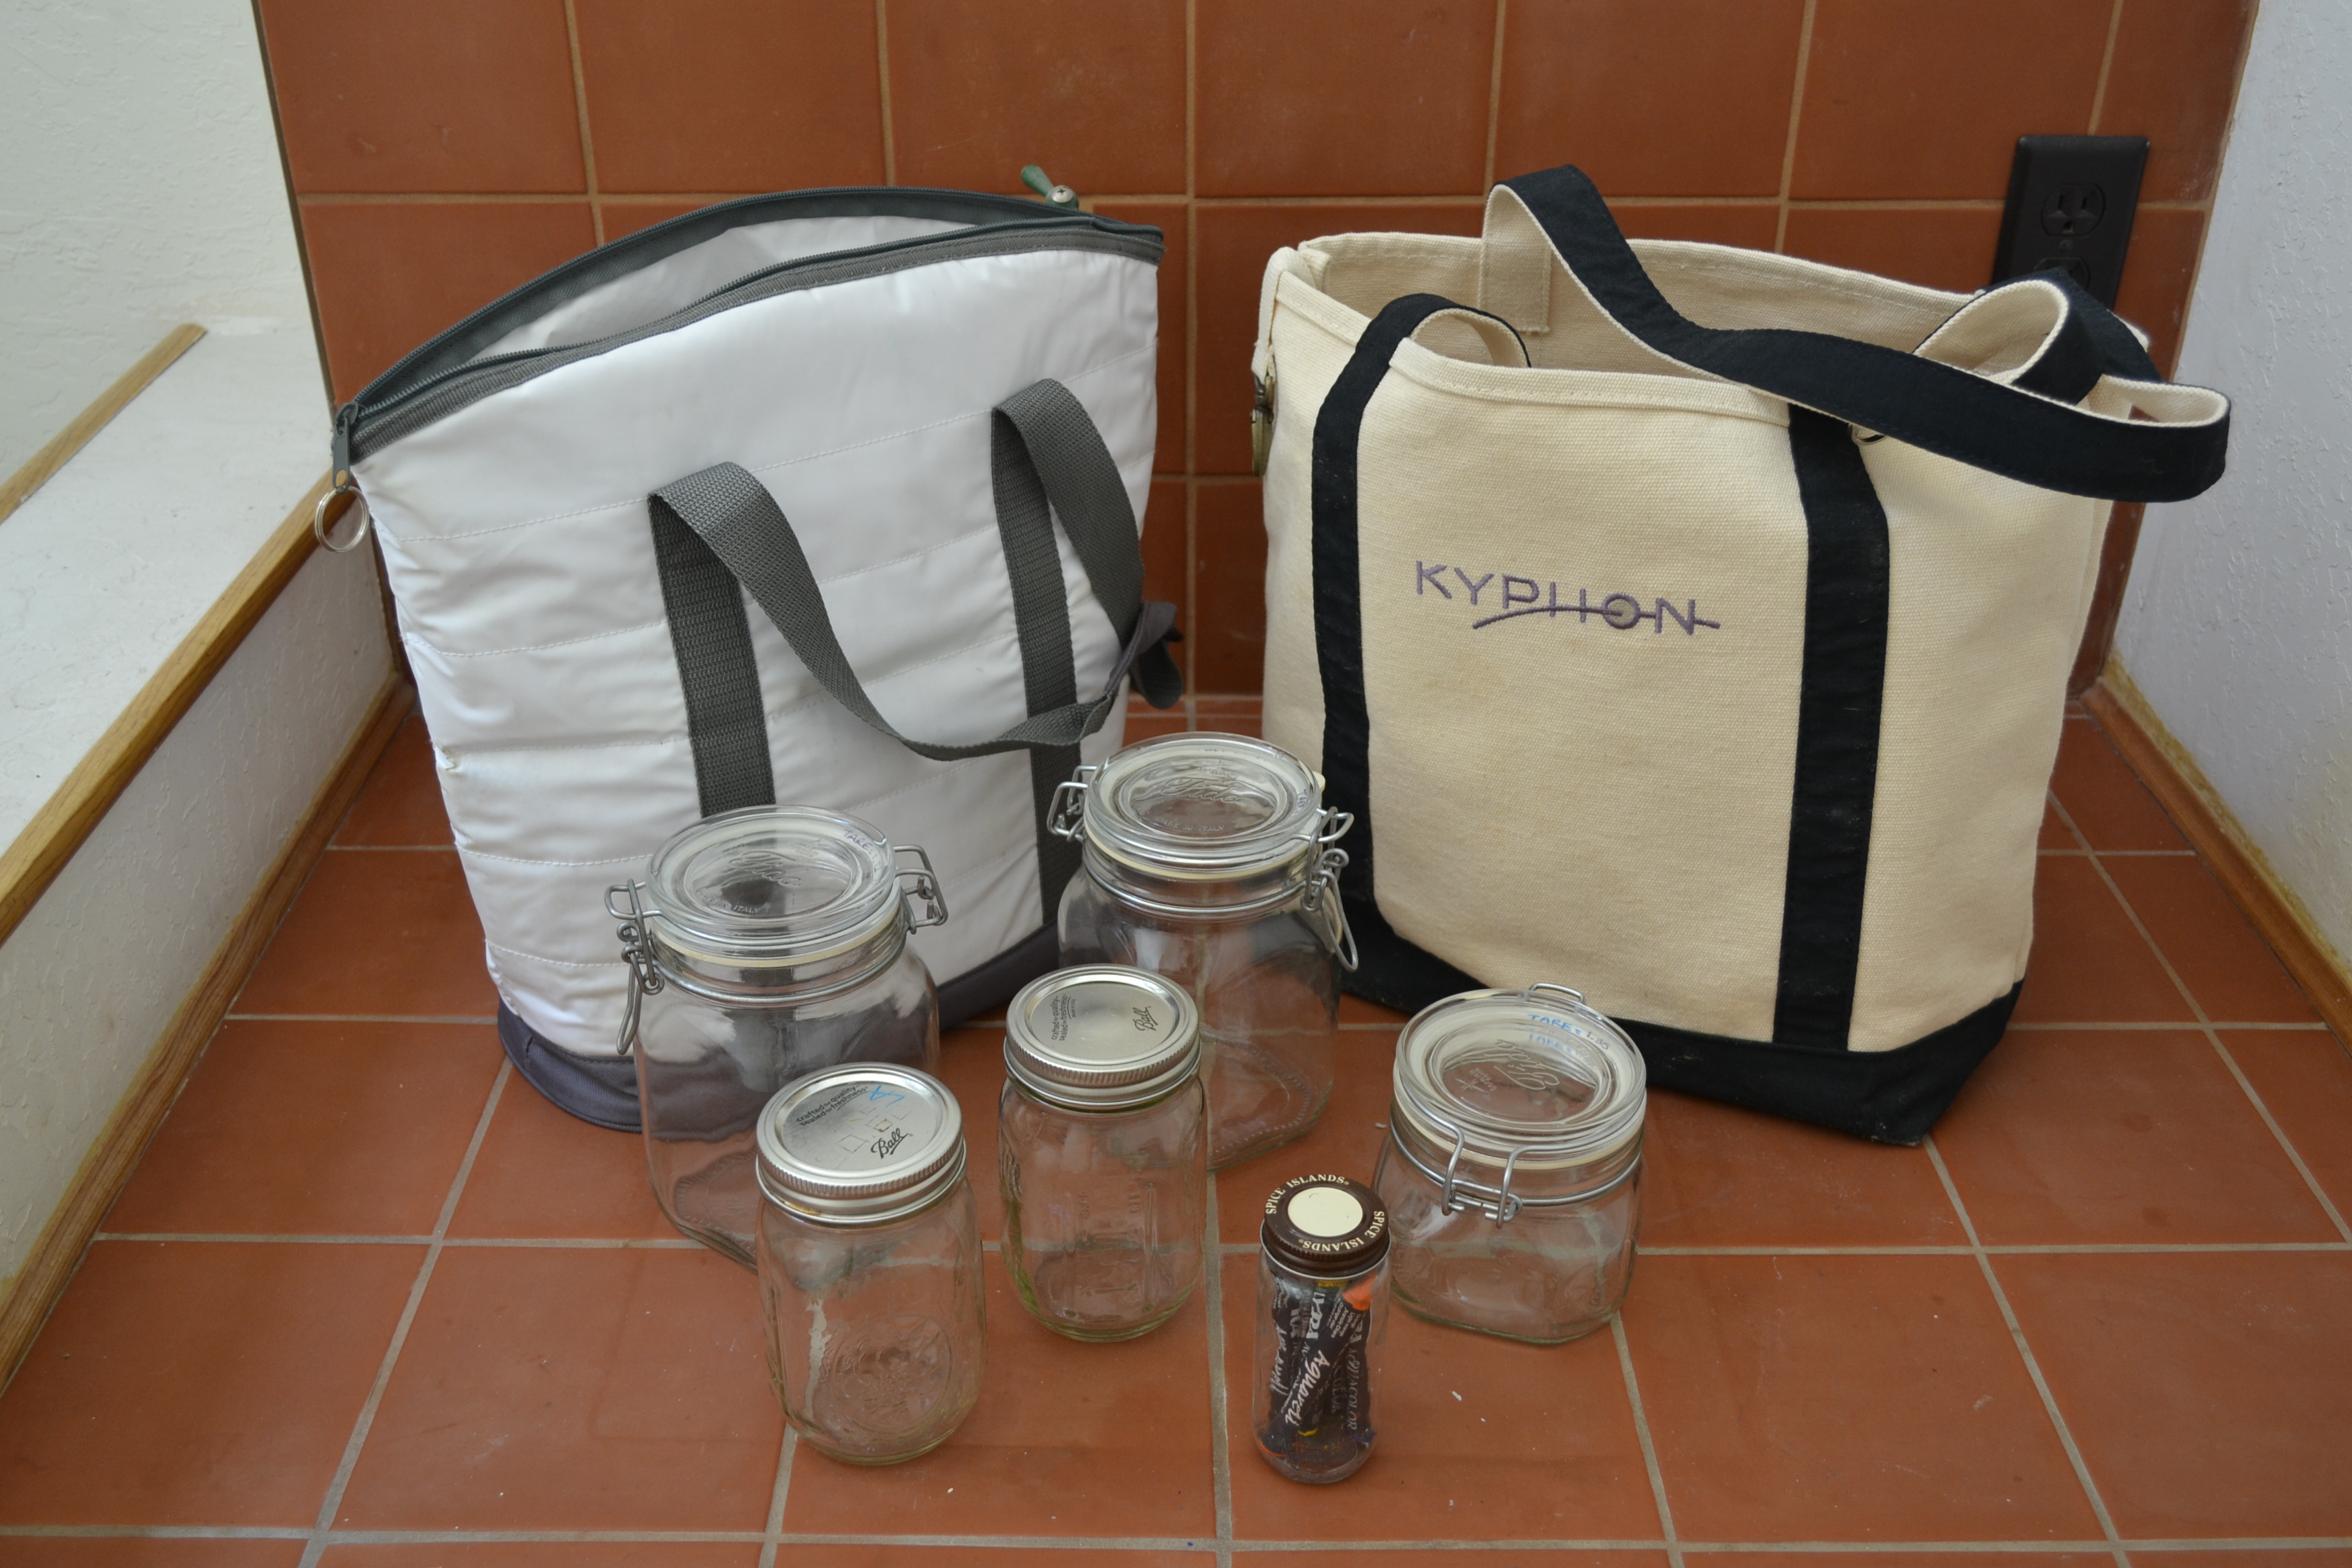
When it comes to grocery shopping, there needs to be an organized system of how you go about gathering your items. Pre-packaged food gave me this convenience when I hadn’t started on my journey to a zero waste lifestyle, so I had to break down what jars and bags I was going to use for bulk shopping.

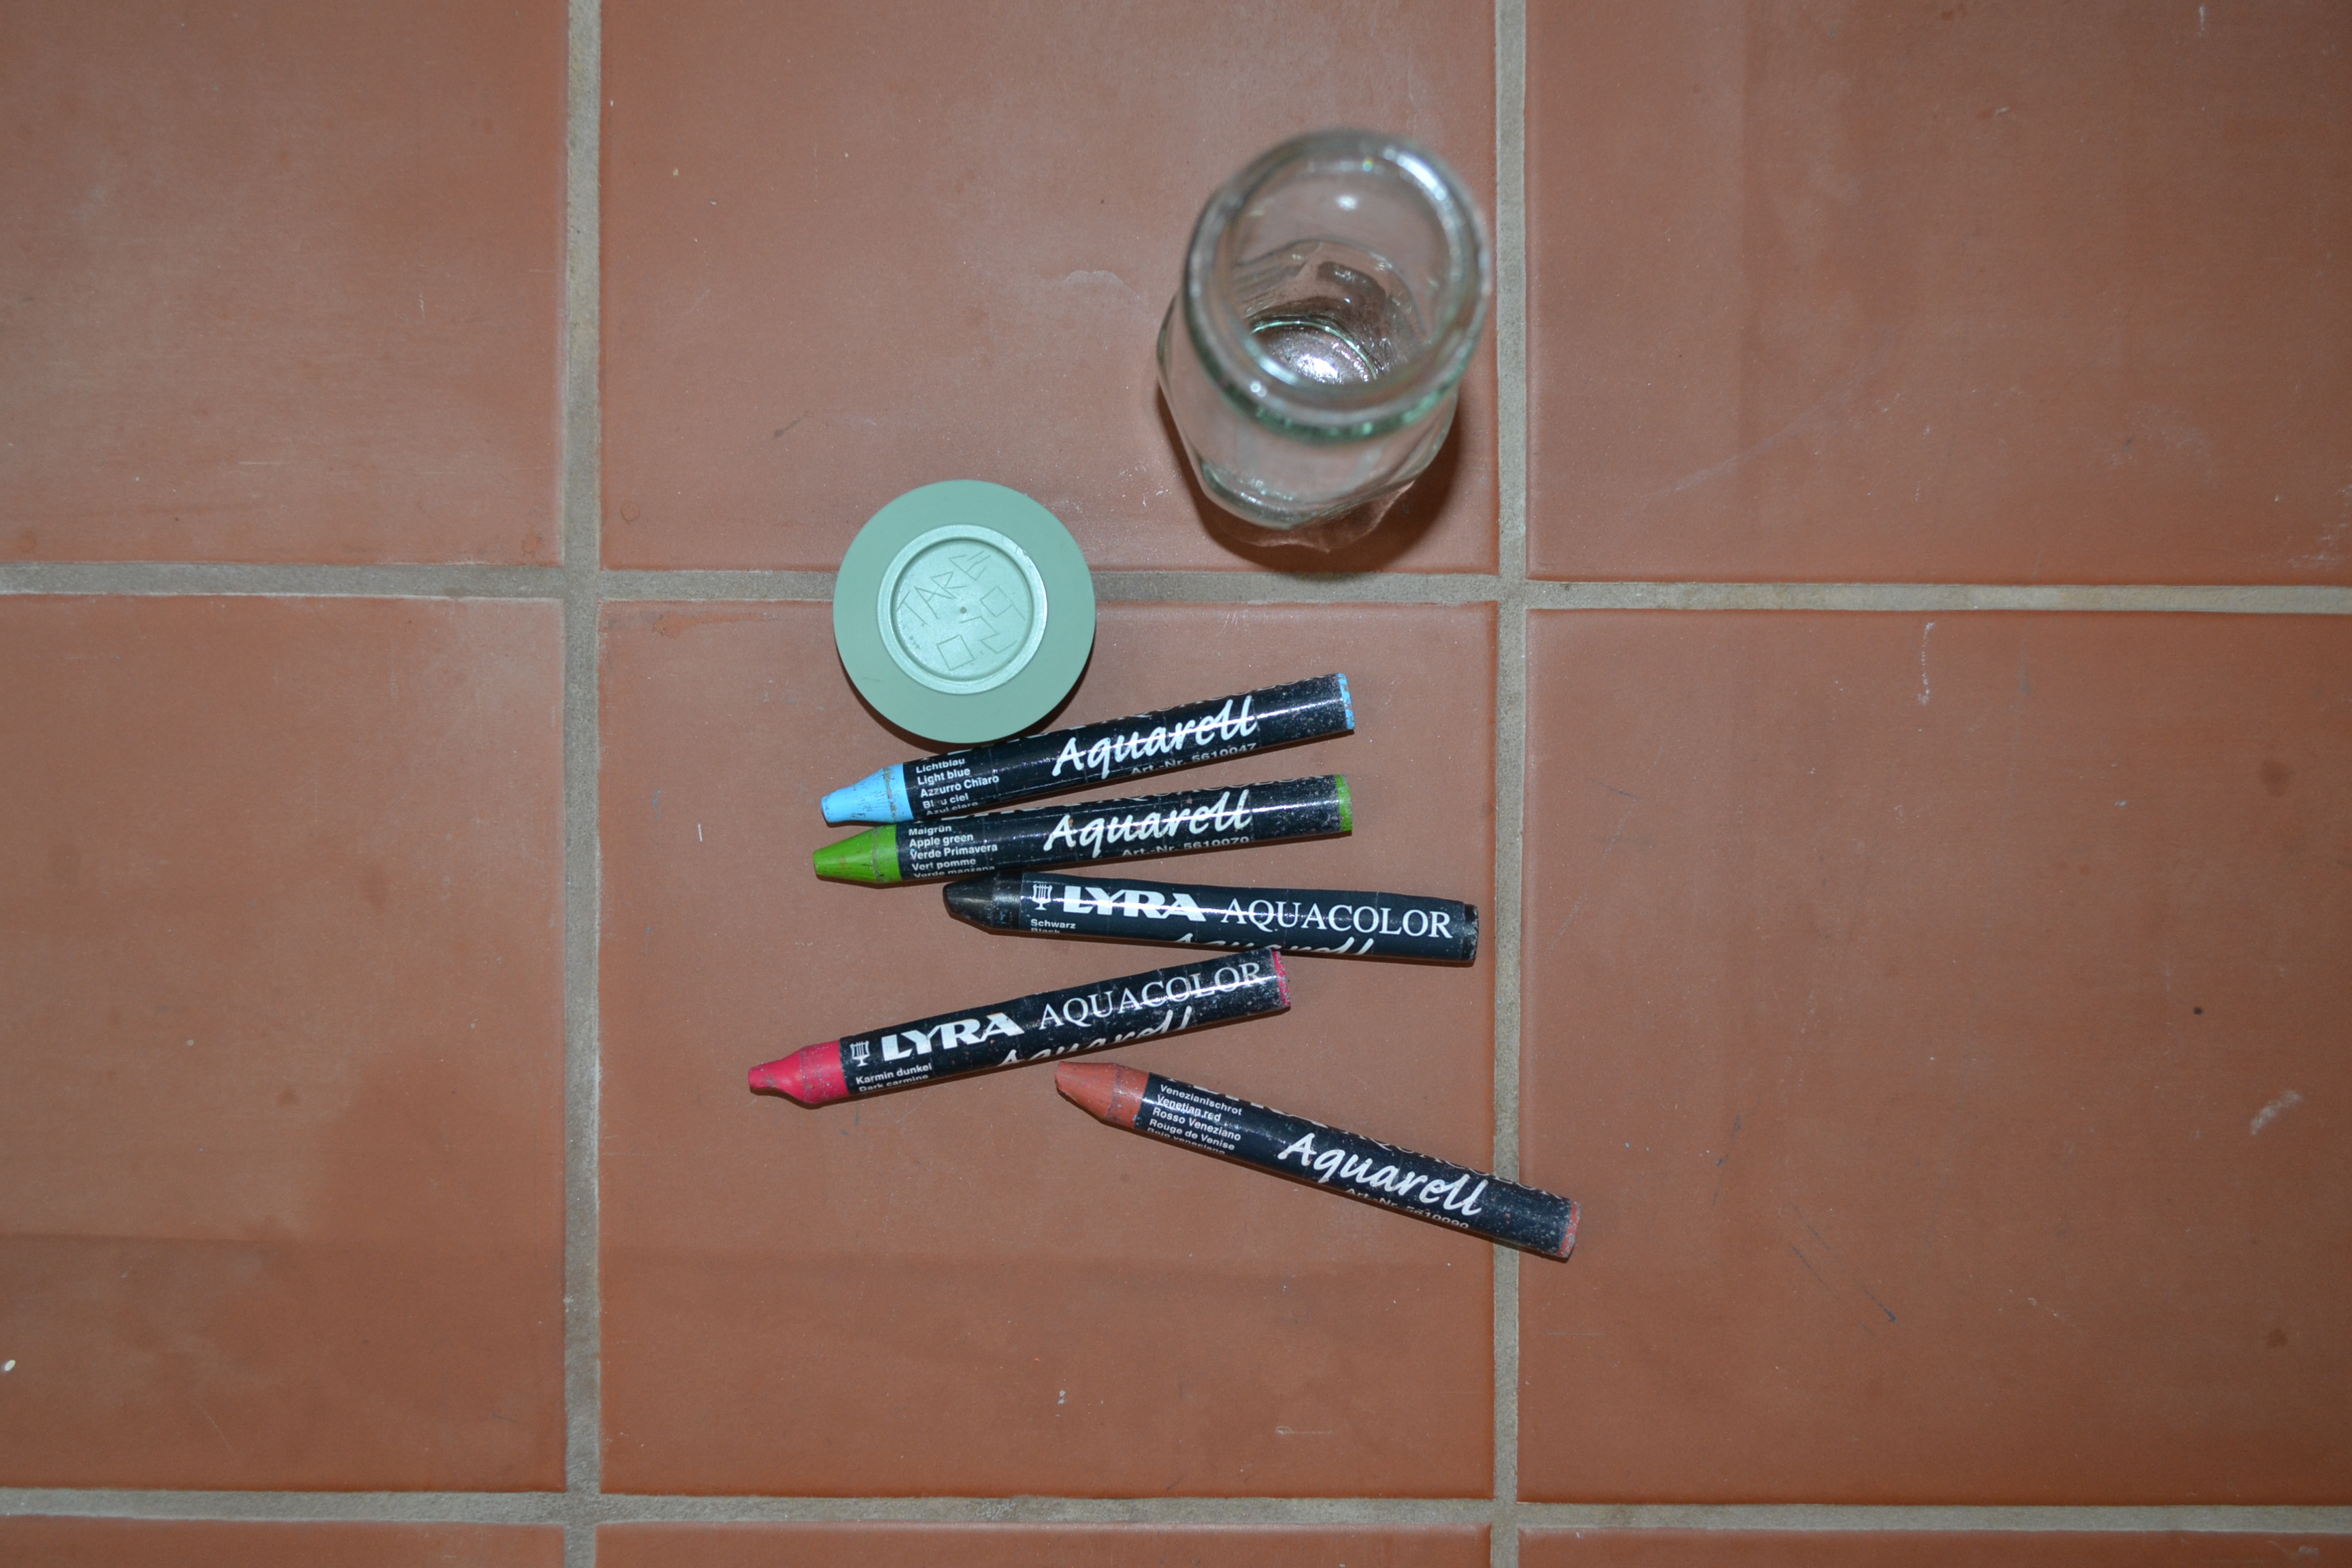
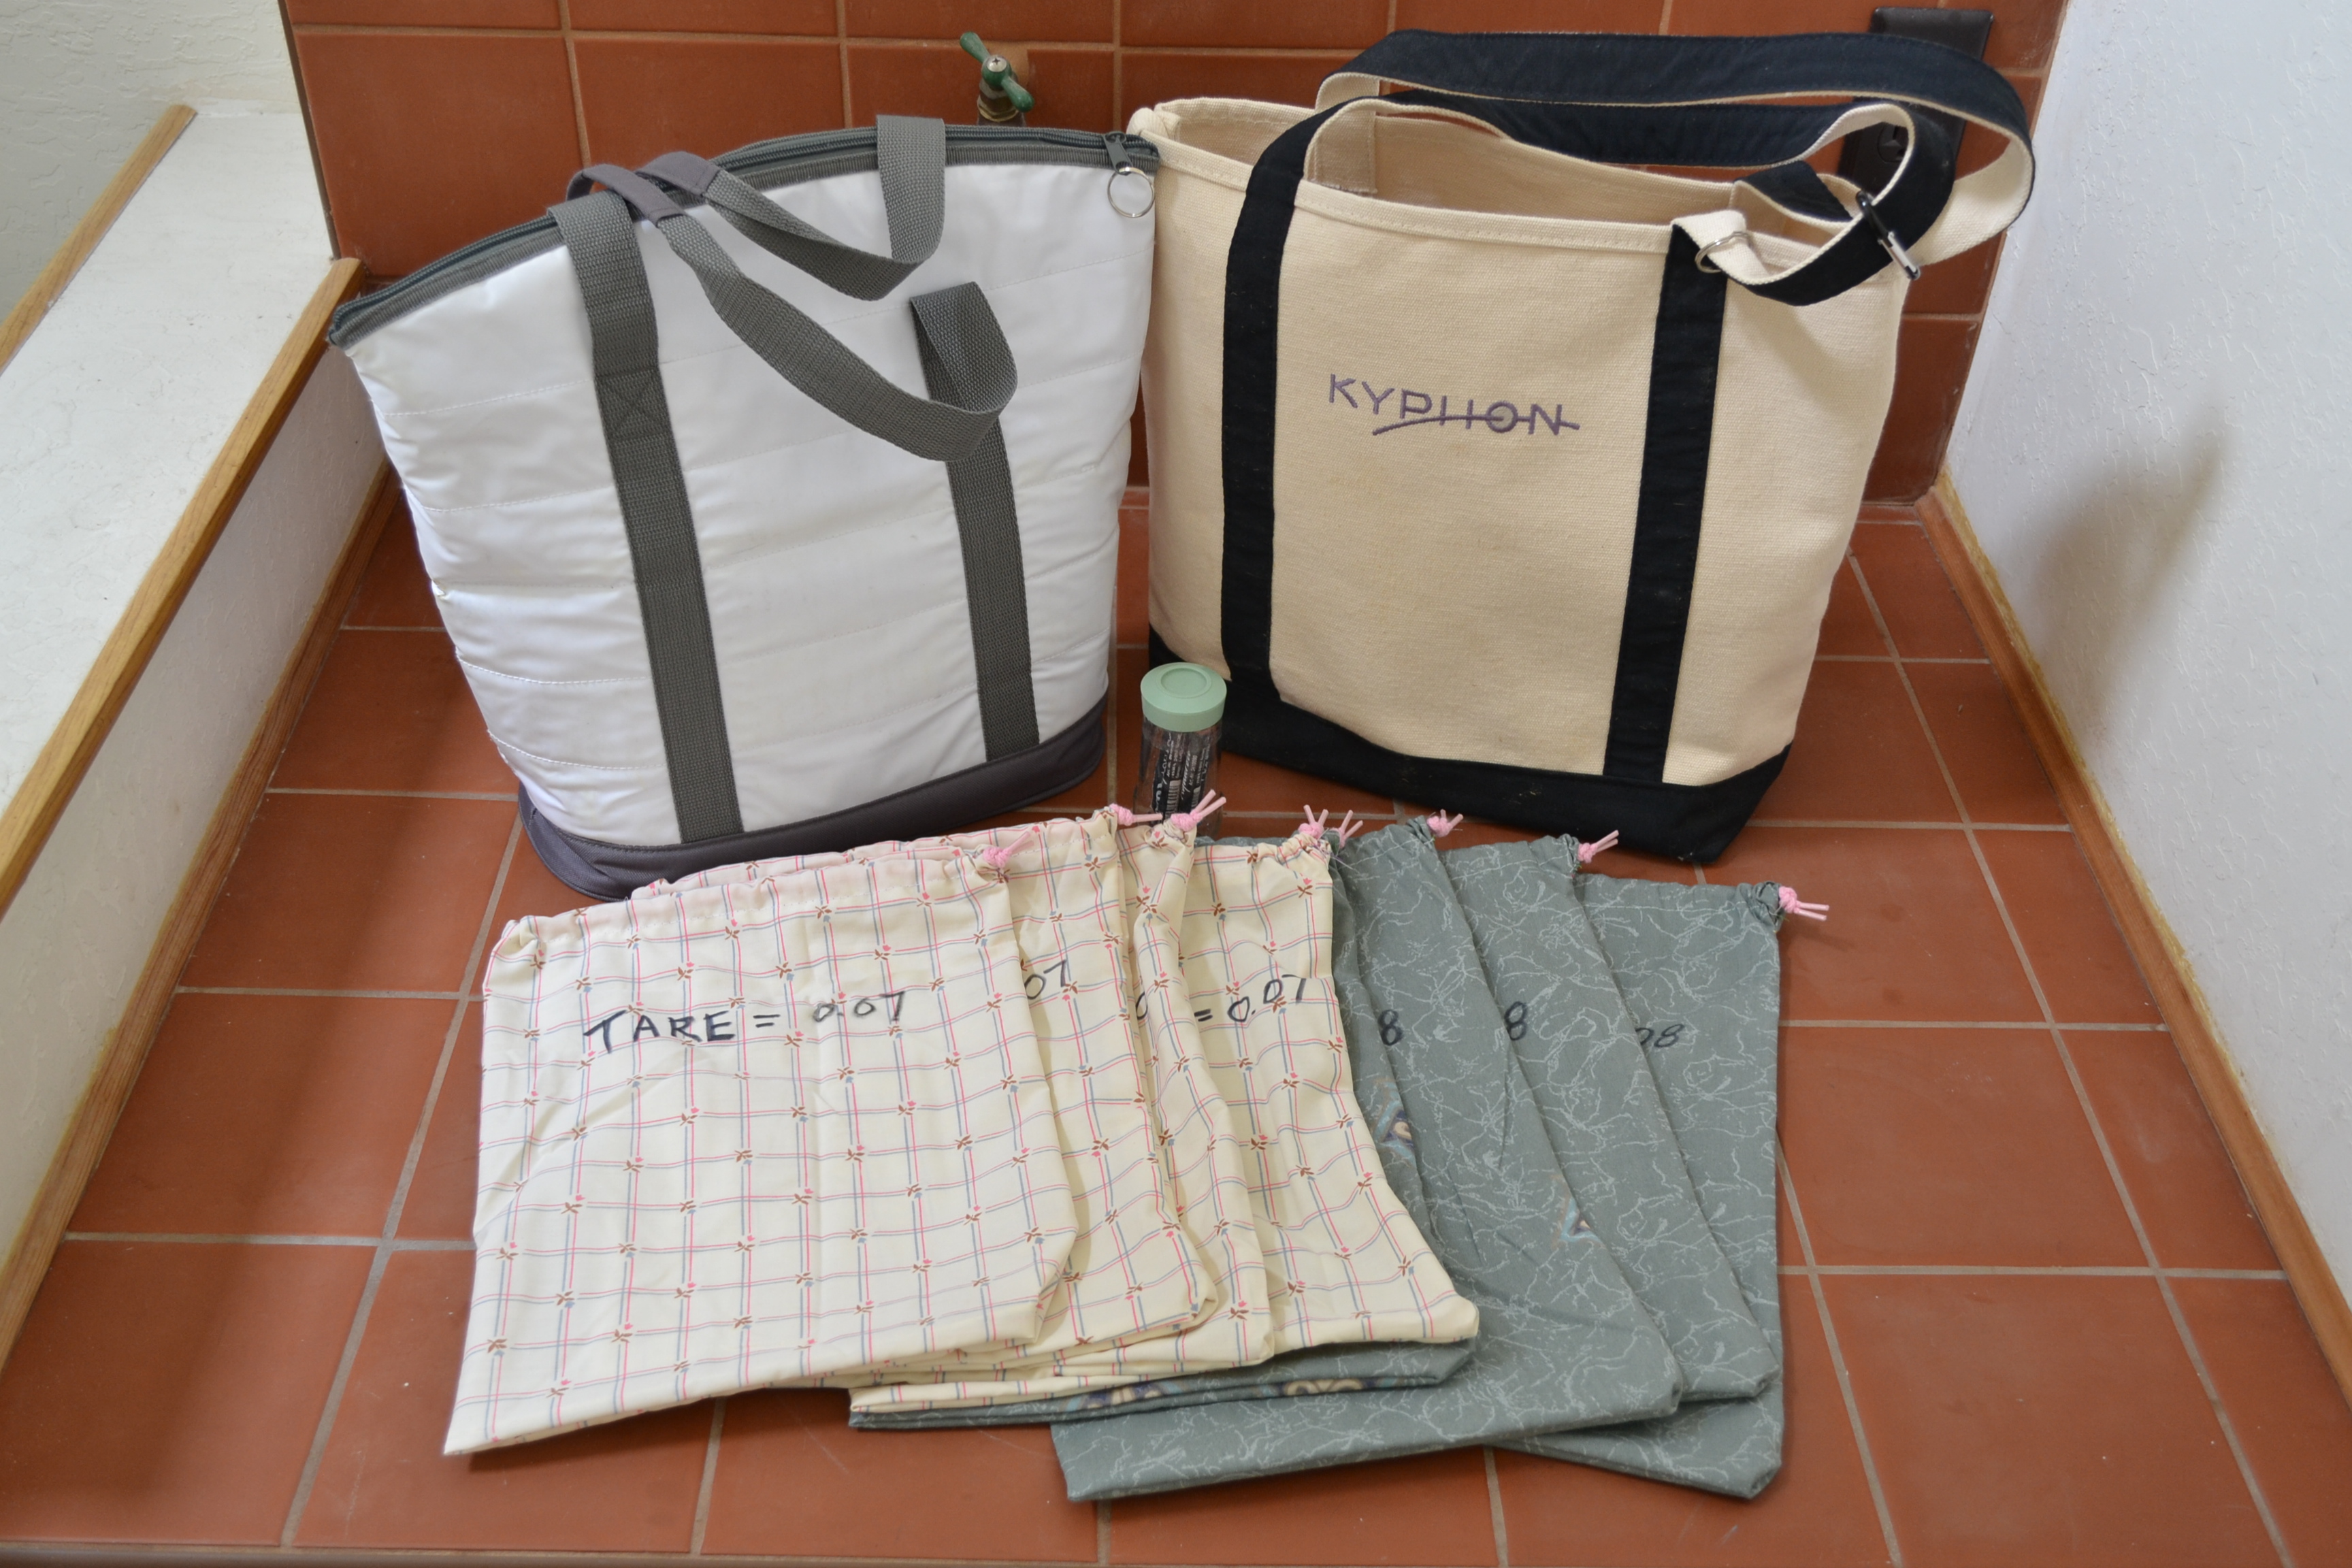
My bulk grocery shopping kit consists of cloth drawstring bags, Ball mason jars, Bormioli Rocco Fido Jars and my Lyra Aqua Color Water-Soluble Wax Crayons. I use the mason jars for liquid bulk food such as almond butter, honey, Bragg’s Liquid Amnios and balsamic vinegar. These jars are great for liquids due to the fact that there is very little left over odor from previous products when you need to use the jars for something else. I tried using the  Bormioli Rocco Fido Jars, but the gasket on those jars absorb odor quite a bit and they stain as well. For the fine grain bulk foods like wheat flour, cane sugar and sea salt, I use the Bormioli Rocco Fido Jars so that the transfer from my grocery bag to my shelf is much simpler. (I literally just move the jar from my grocery bag to my shelf- yea, unpacking after grocery store trips is that fast). The jars are also great for storing snacks from the trail mix bins section. If the jars are too heavy to bring to the grocery store, then the bags will still be fine to use. The drawstring bags are used for the rest of bulk grocery shopping as well as fruits and vegetables.

DSC_3717
DSC_3716

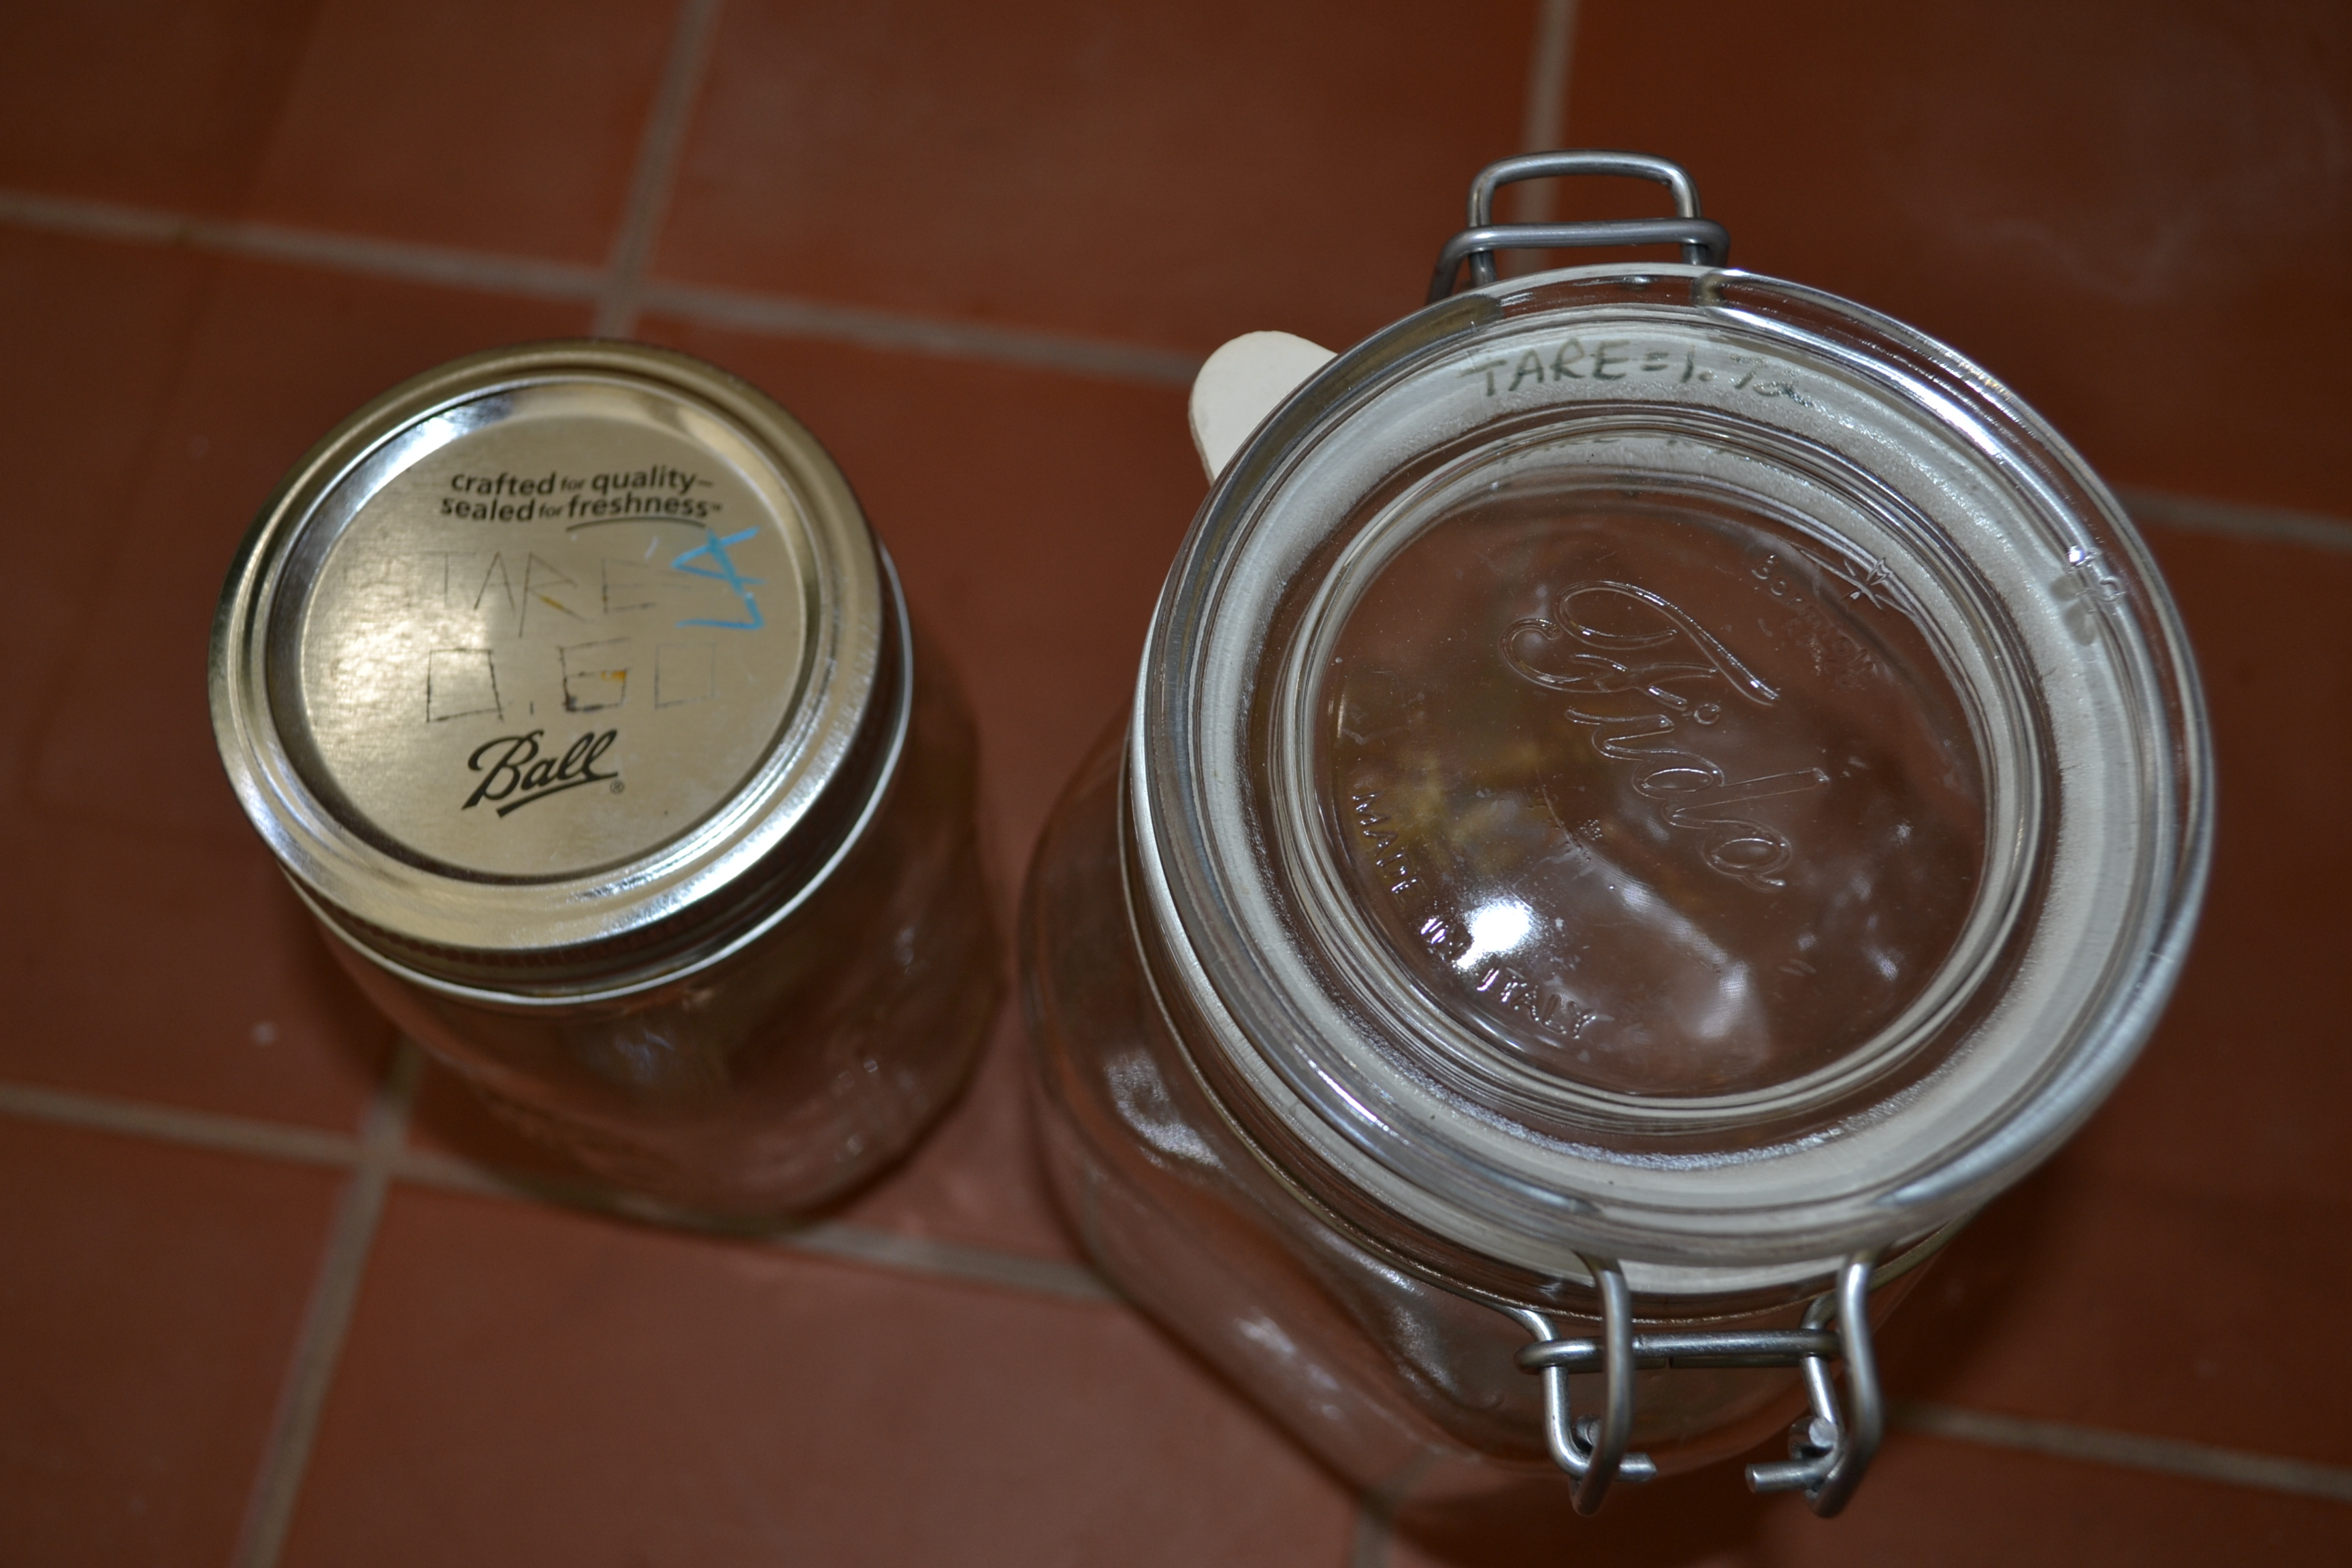
When you use the mason jars and the fido jars, make sure you tare the weight of the jars before filling them up. For the mason jars, I usually carve the tare weight into the lid of the jar and for the fido jars, I’ll write the tare weight on the inside of the gasket so that the cashier can see the weight through the lid. I write the PLU (price look up) code and the initials of the bulk food on the lid with the water soluble crayons. I write the initials alongside the PLU code because products with the same consistency and color can be mixed up (ie. balsamic vinegar and liquid amnios). I hope my bulk grocery shopping kit helps in prepping your grocery shopping kit. If you have any questions, I’m more than willing to answer them.

DSC_3984